Step 0
- Have your Server installed and configured with a valid license.
- Login as a Server administrator
Step 1: Generate a public/private cryptographic key pair
All communication between EasyMorph Server and the Gateway and all your data in the Gateway is asymmetrically encrypted using a pair of private and public keys. The private key remains on your Server and is used to decrypt data when it arrives at your Server. Keep the private key confidential, don't share it with anyone, including us, EasyMorph employees. The public key is used to encrypt data and can't be used to decrypt data, so it can be freely shared. That's why it's called public. We will need the public key to configure your account on the Gateway.
- Go to tab "Gateway"
- Press "Generate new" in the "Private keys" section (1)
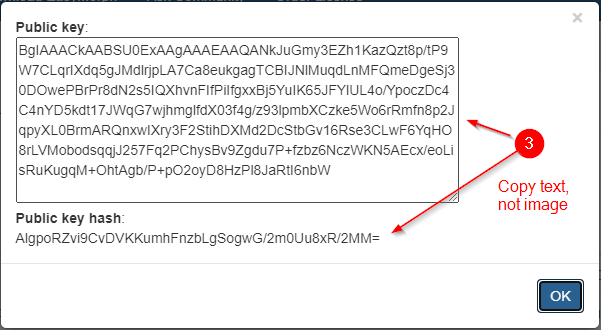
- Press "Get public key" (2)
- Copy the text (not the image) of both public key and public key hash and send it to our support email.

Step 2: Connect to the Gateway
After you sent us the public key and its hash, we configure a Gateway account for you and send you back a tenant ID and a Gateway URL.
- Enter the Gateway URL that we sent you
- Enter the tenant ID that we sent you
- Press "Apply"
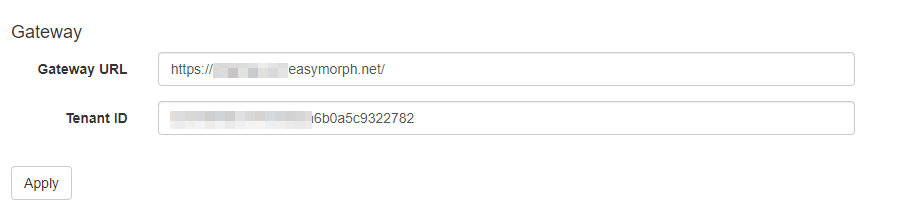
Note that the URL ends with easymorph.net, not easymorph.com.
If no errors shown, you are all set and can create new endpoints on the Gateway.
Step 3: Configure your first endpoint
An endpoint is a public URL that can be used to receive incoming HTTP requests (e.g. webhooks). An endpoint may require no authorization, or require a particular HTTP header or URL parameter set to a particular value.
-
Press "Add endpoint" in the tab "Gateway"
For the new endpoint:
-
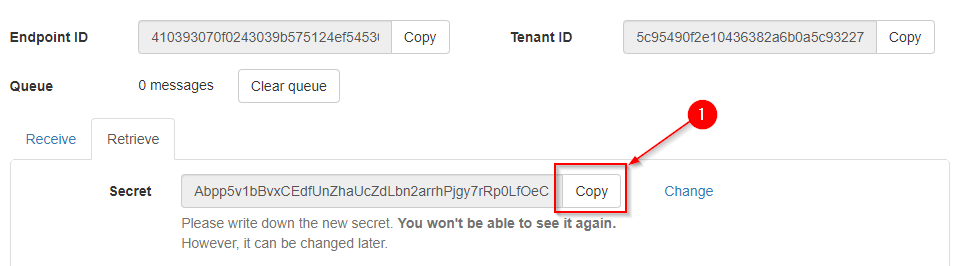
Write down its secret, because it's shown only once. The secret will be needed when you will later configure an EasyMorph Gateway connector in EasyMorph Desktop. The secret authorizes the connector to receive incoming messages from the endpoint's queue.
-
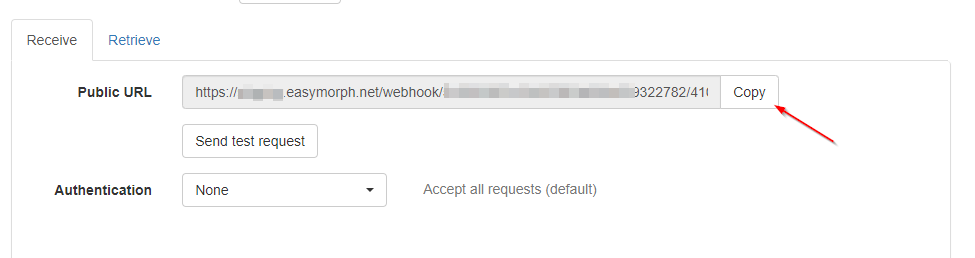
Switch to tab "Receive". Here you can copy the endpoint's public URL for use in external/cloud applications.
-
If required, configure authentication.
-
Optionally, send a test request. Notice that the queue count has increased by 1.
Step 4: Send some test data to the endpoint
Your Gateway endpoint, which you configured in the previous step, is now ready to receive incoming HTTP requests (e.g. webhooks) from any application, service, or device that can send HTTP requests. You can test the endpoint with 3rd party tools, such as curl or Postman. And, of course, you can use the web request actions in EasyMorph for that too.
The project below sends a dummy JSON to the endpoint. Just provide the tenant ID and endpoint ID in the project parameters and hit "Run".
test-endpoint.morph (3.6 KB)
Step 5: Configure EasyMorph Gateway connector
Now your first endpoint is configured. Time to receive messages from it.
- Open EasyMorph Desktop (v5 or later)
- Open the Connector Manager
- Add a new "EasyMorph Gateway endpoint" connector, provide the Server URL (not the endpoint URL) and the endpoint secret (the one above that was only displayed once)
- Optionally, press "Test" to test the connector.
Step 6: Retrieve incoming messages from the endpoint
Create a new workflow and add the "Incoming webhook messages" action with the connector configured in the previous step.
The action is used to retrieve messages from a Gateway endpoint's queue and can work in two modes - receive and delete messages, and receive but not delete messages. The latter can be used for development and testing because it's not destructive. You can run the action in this mode multiple times to receive the same last few messages again and again.
In the former mode ("receive and delete"), once you receive a message it's removed from the queue and you won't be able to re-receive it again. However, if the workflow fails (or gets canceled), the received messages will be returned back to the queue automatically.
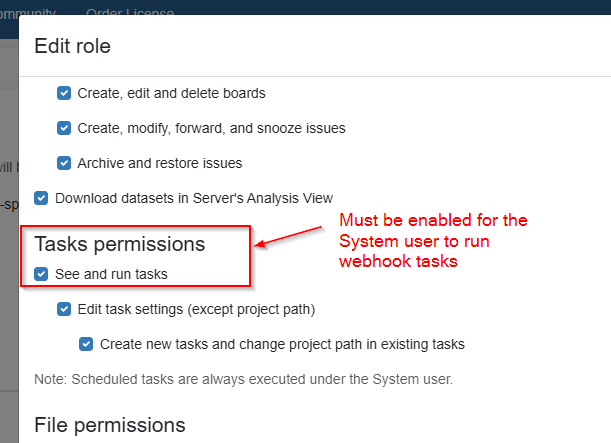
PS. This post and all comments to it will be made public after the official release of v5.0.