With a bit of APEX scripting, it is possible to capture various events in Salesforce (e.g. adding a new customer) using webhooks. This enables a broad spectrum of possible real-time automations for Salesforce and outside of it.
Below, I will demonstrate how we can use EasyMorph Gateway to process and modify entities in Salesforce as they are created, updated, or deleted - all in real time. For those who are not familiar with the Gateway, it's a cloud-based service that receives incoming webhooks and immediately triggers designated EasyMorph Server tasks that process the incoming requests.
Prerequisites
Suppose, you've successfully set up a Webhook Gateway endpoint (see here).
For the sake of this example let the webhook endpoint URL be https://gateway-eu3.easymorph.net/webhook/42b1e959bba2419fb7512a08f5c00abe/e5a6bbd31f5f479fb930f1d97ea540f9
NB: it's worth noting that the webhook URL you'll receive after Gateway setup would be different, including the gateway-eu3 part.
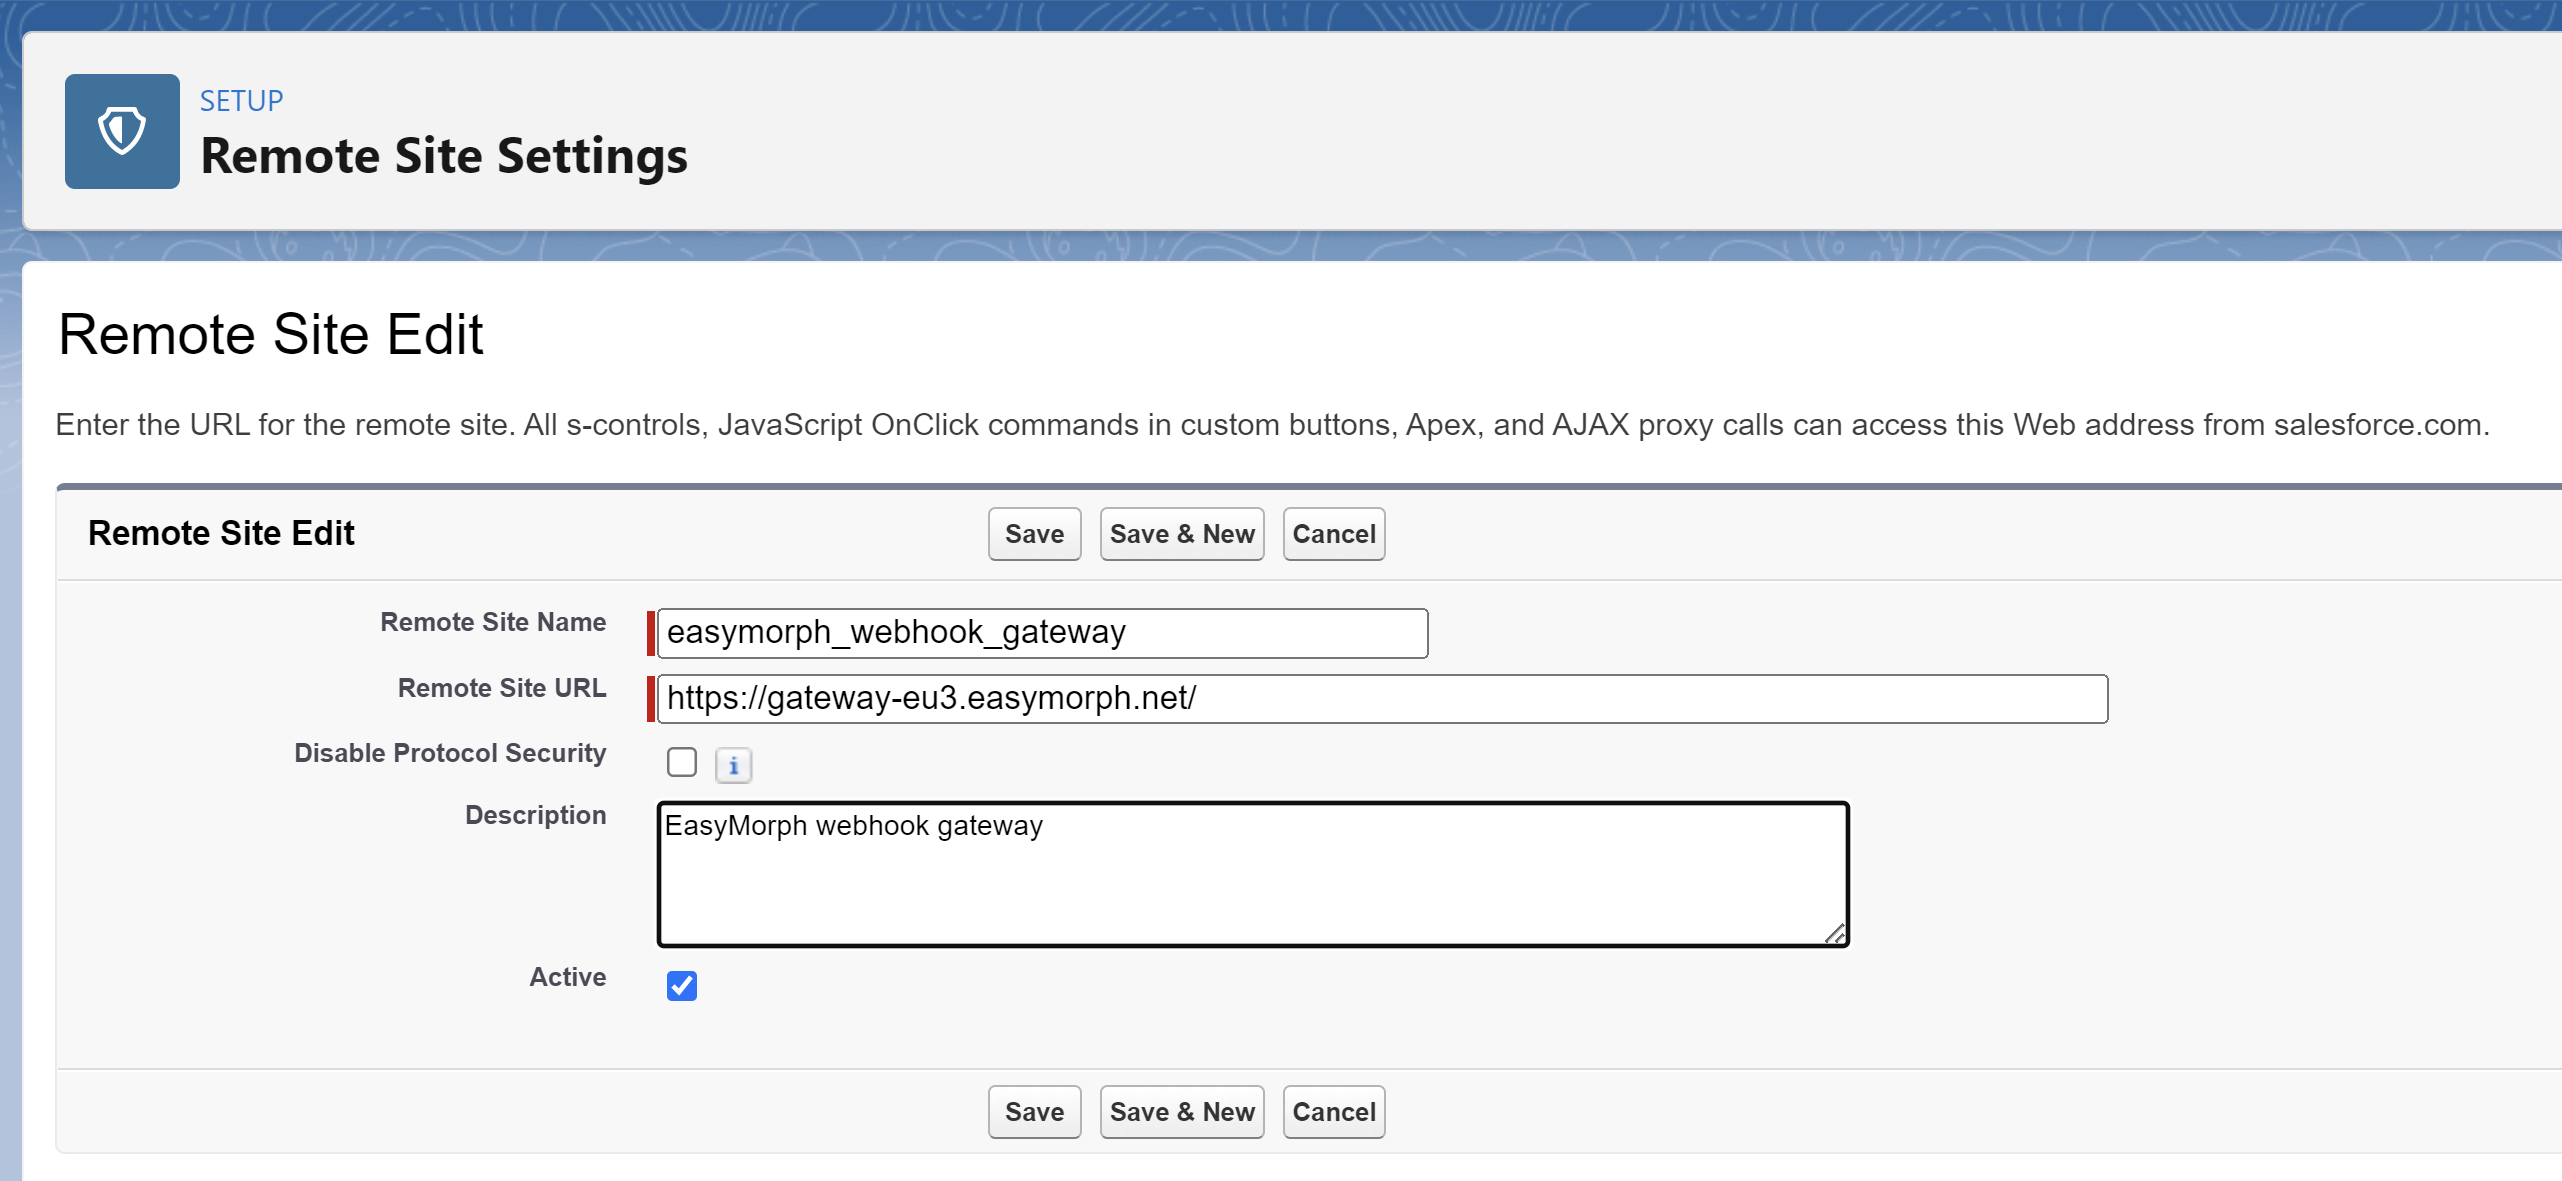
Whitelisting Webhook Gateway in Salesforce
Salesforce requires all outbound HTTP request URLs to be whitelisted, so we should whitelist our Webhook Gateway endpoint URL.
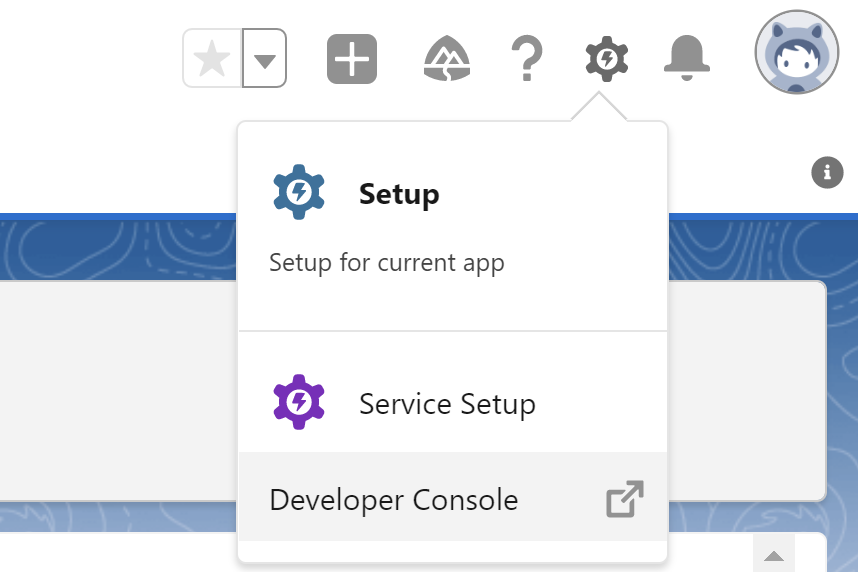
Login to Salesforce account, go to Setup ![]()
Security ![]()
Remote site settings and add Webhook Gateway URL:
Creating notification service in Salesforce
Now, we need to do some APEX programming. We are going to create a simple service that can send a POST HTTP request (by our convention, this should mean that something is created in Salesforce) or DELETE HTTP request (when something gets deleted in Salesforce) to our Webhook Endpoint URL and later we will use this service to issue notifications.
Of course, available methods are not limited to POST/DELETE, these two are picked just for example.
In Salesforce, go to the Developer Console
And select File → New → Apex Class from the menu bar. We're going to create a service that encapsulates all Gateway-specific functionality:
public class WebhookService {

    private static string webhookURI = 'https://gateway-eu3.easymorph.net/webhook/42b1e959bba2419fb7512a08f5c00abe/e5a6bbd31f5f479fb930f1d97ea540f9';

    public static void NotifyAdded(Object payload){
        makeWebhookRequest('POST', JSON.serialize(payload));
    }

    public static void NotifyDeleted(Object payload){
        makeWebhookRequest('DELETE', JSON.serialize(payload));
    }

    @future(callout=true)
    private static void makeWebhookRequest(string method, string payload) {
        HttpRequest request = new HttpRequest();

        request.setHeader('Accept', 'application/json');
		request.setHeader('Content-Type', 'application/json');
        request.setEndPoint(webhookURI);
        request.setMethod(method);
        request.setBody(payload);

        HttpResponse response = new HTTP().send(request);
    }
}
The code is pretty straightforward. We take some entity as payload argument, transform it to JSON and then send it to our webhook URI as a body of POST or DELETE request.
Note that here we just hard-coded the webhook endpoint URI, but you are free to use more flexible configuration storage for your real Salesforce environment.
Creating the trigger
Finally, we should write the part that actually calls our WebhookService when something happens. In Salesforce this is implemented using Triggers which are a Salesforce-specific piece of code that gets executed every time something happens.
Triggers are also entity-specific, meaning that we have to decide what entity types we would like to spawn notifications. Let's decide, for the sake of this article, that we would like to get notifications every time a Contact gets deleted or created.
From the Developer Console pick File → New → Apex Trigger
trigger ContactTrigger on Contact (after insert, after delete) {
    if (Trigger.isInsert) {
     System.debug('Contact(s) added');
        for(Contact c : Trigger.New) {
            WebhookService.NotifyAdded(c);
    	}
    }
    else if (Trigger.isDelete) {
    System.debug('Contact(s) deleted');
 		for(Contact c : Trigger.Old) {
            WebhookService.NotifyDeleted(c);
    	}
	}
}
Extra
That's all you need - completing all these steps, you can already use EasyMorph with the Incoming webhook messages action to receive notifications about new or deleted Contacts:

However, you can also add real-time processing.
Create an EasyMorph server task with your existing workflow that contains the Incoming webhook messages action. Then, go to the Gateway tab in EasyMorph Server, pick your Salesforce-designated endpoint (), and then click the Task tab.
Here is the option that turns on real-time processing. Tick the Process incoming messages with a task as they arrive, select the task you created, ensure that the radio button Processing is set to Active, and save the changes:

Now, each time something happens with Contact in Salesforce, EasyMorph Server will be notified about a new message in the Gateway and will instantly run a task, allowing you to process everything on the fly. Note that in regards to Salesforce that isn't limited to reading entities only. Using EasyMorph actions that Update or Delete Salesforce records you can craft a workflow that performs some validation or entity hydration (e.g. updating newly created Contacts with information pulled from some external or private sources).
That's all for now.