Tableau Cloud or Server support webhooks for a set of events, which enable a variety of automation scenarios. For instance:
- When an extract refresh fails, file a ticket in Jira automatically.
- When a workbook is updated, notify your team via their Slack channel.
- When a data source is published, email a data steward asking them to review and certify it.
- When a workbook refresh completes successfully, generate a PDF and post it to SharePoint.
It's possible to configure EasyMorph Server to handle such webhooks using EasyMorph Gateway, an optional cloud-based service for processing webhooks from external applications.
The Started pack of the Gateway is already included with the Team and Enterprise editions of EasyMorph Server.
In this article, we will show you how to configure Tableau Cloud or Server, EasyMorph Gateway, and EasyMorph Server to send a message to a Slack channel every time when a Tableau workbook refresh fails. The diagram below shows the process:
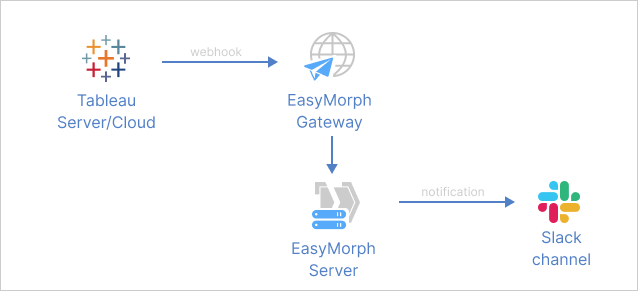
The process has the following steps:
- Create an EasyMorph Gateway endpoint - this endpoint will receive webhooks from Tableau Server/Cloud
- Configure a webhook in Tableau Server / Cloud
- Create a Server task that will handle incoming webhooks - the task will obtain the event details
- Add Slack notifications to the project
- Make the Server to process incoming webhooks automatically
Let's look closer at how it's done:
Step 1: Create a Gateway endpoint
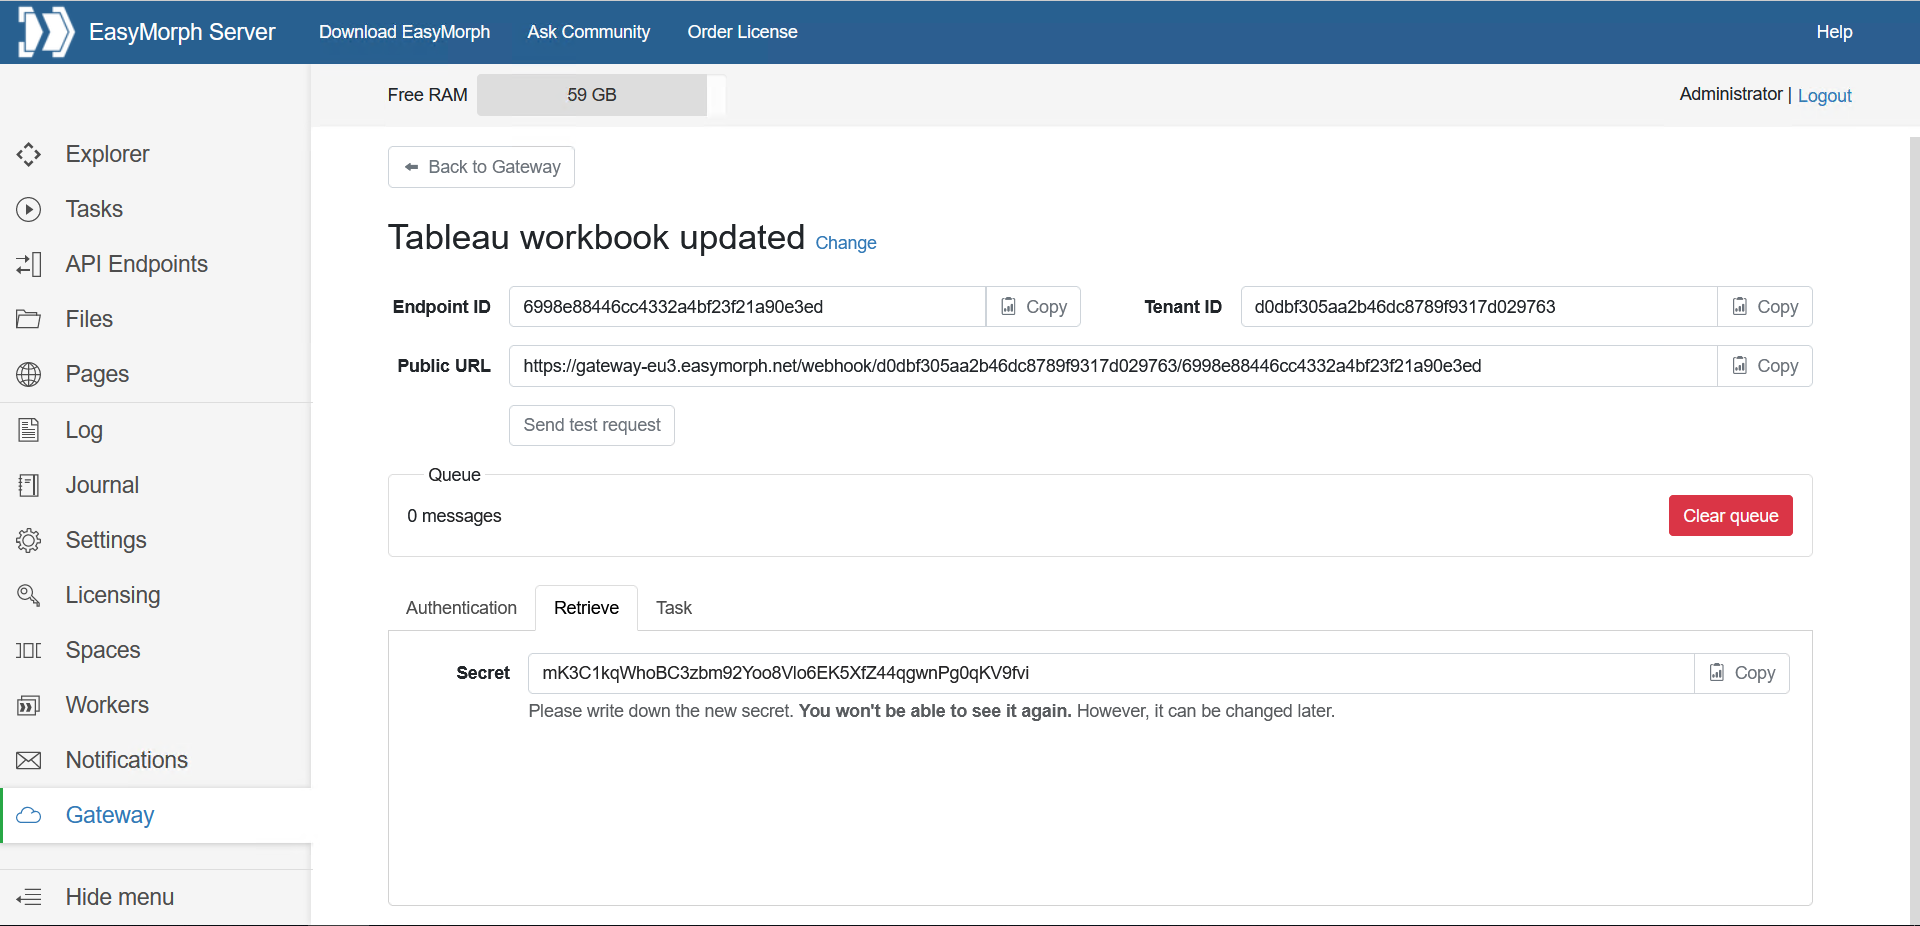
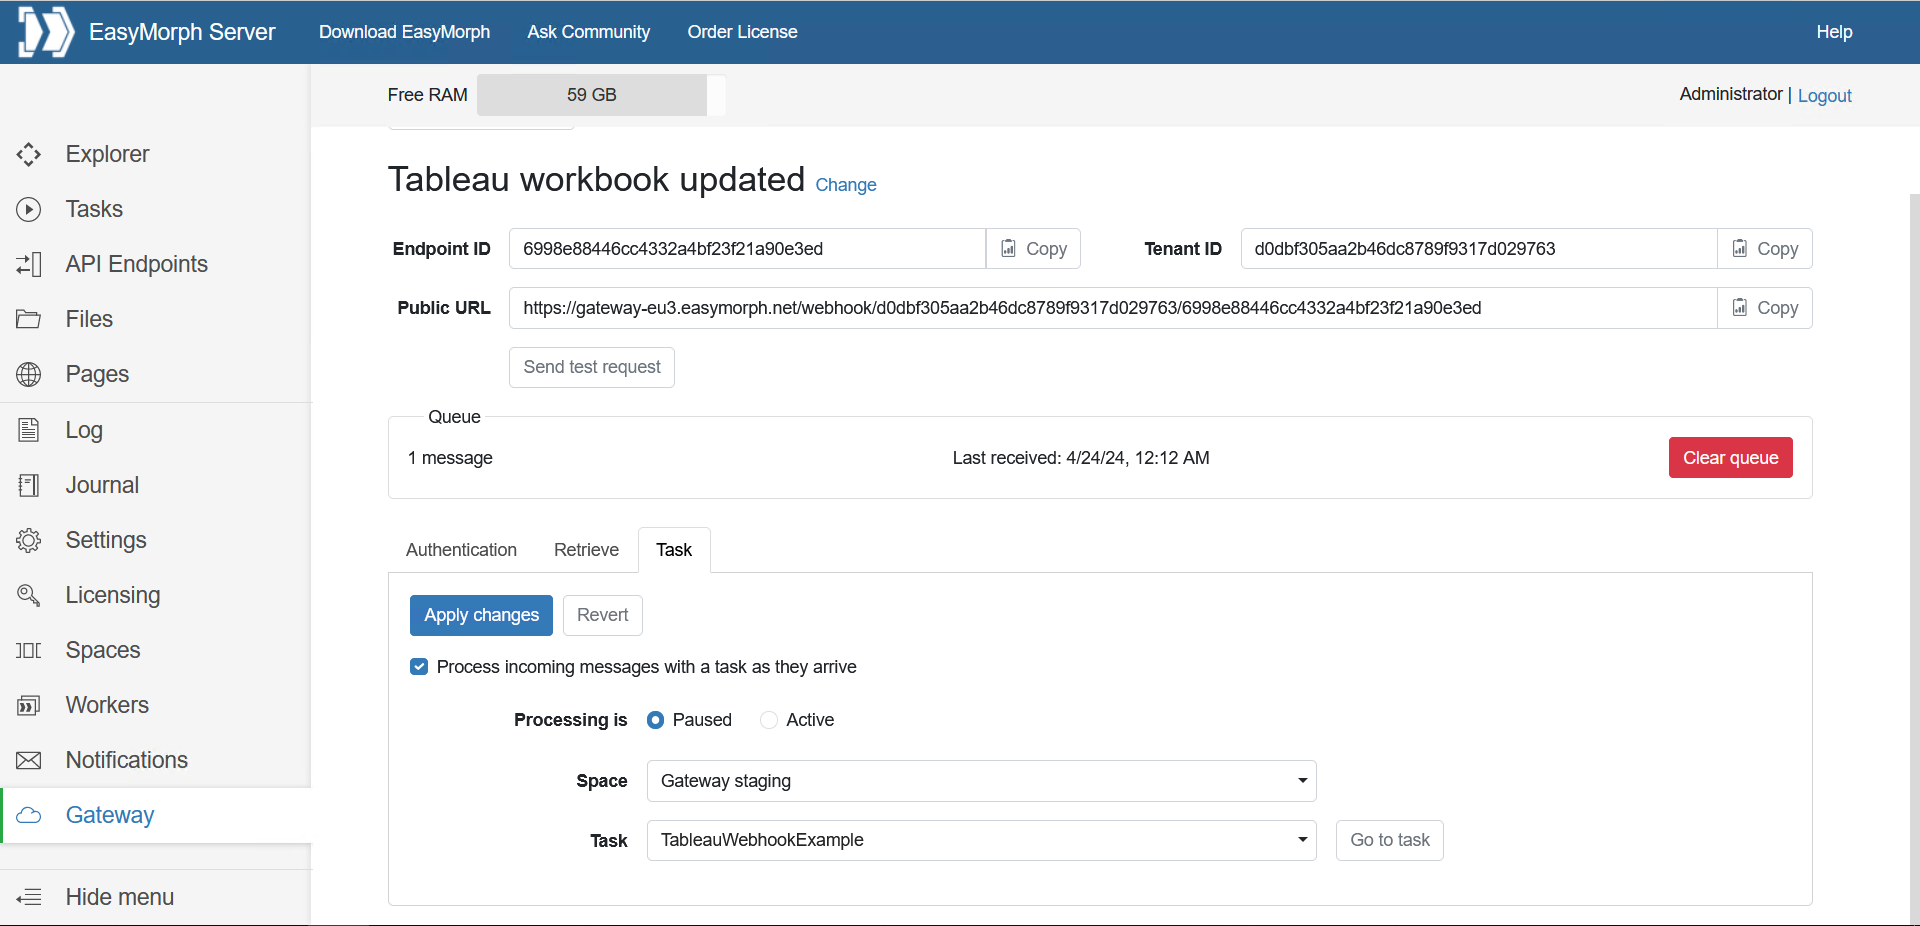
Log in as Administrator to EasyMorph Server, go to the "Gateway" page, and click the "Add endpoint" button. Type in an arbitrary endpoint name. Save "Endpoint ID", "Public URL" and "Secret" of the created endpoint.
If you're new to the Gateway, read this article first: How to configure a connection to EasyMorph Gateway
Step 2: Configure a webhook
Unfortunately, webhooks can't be configured from Tableau UI, but you can configure webhooks using cURL or Postman, or, of course, using the "Web Request" action in EasyMorph.
Use "WorkbookRefreshFailed" as the event name and the saved "Public URL" of the created endpoint as the webhook URL. The name of the webhook is not important.
To check that the webhook was created correctly, you can test it by sending an empty payload. Tableau documentation mentions how to do it with cURL or Postman. If the test is successful, the "Queue" block of the Gateway endpoint page should say "1 message". If it does - clear the queue using the corresponding button.
Step 3: Create a server task that will handle webhook calls
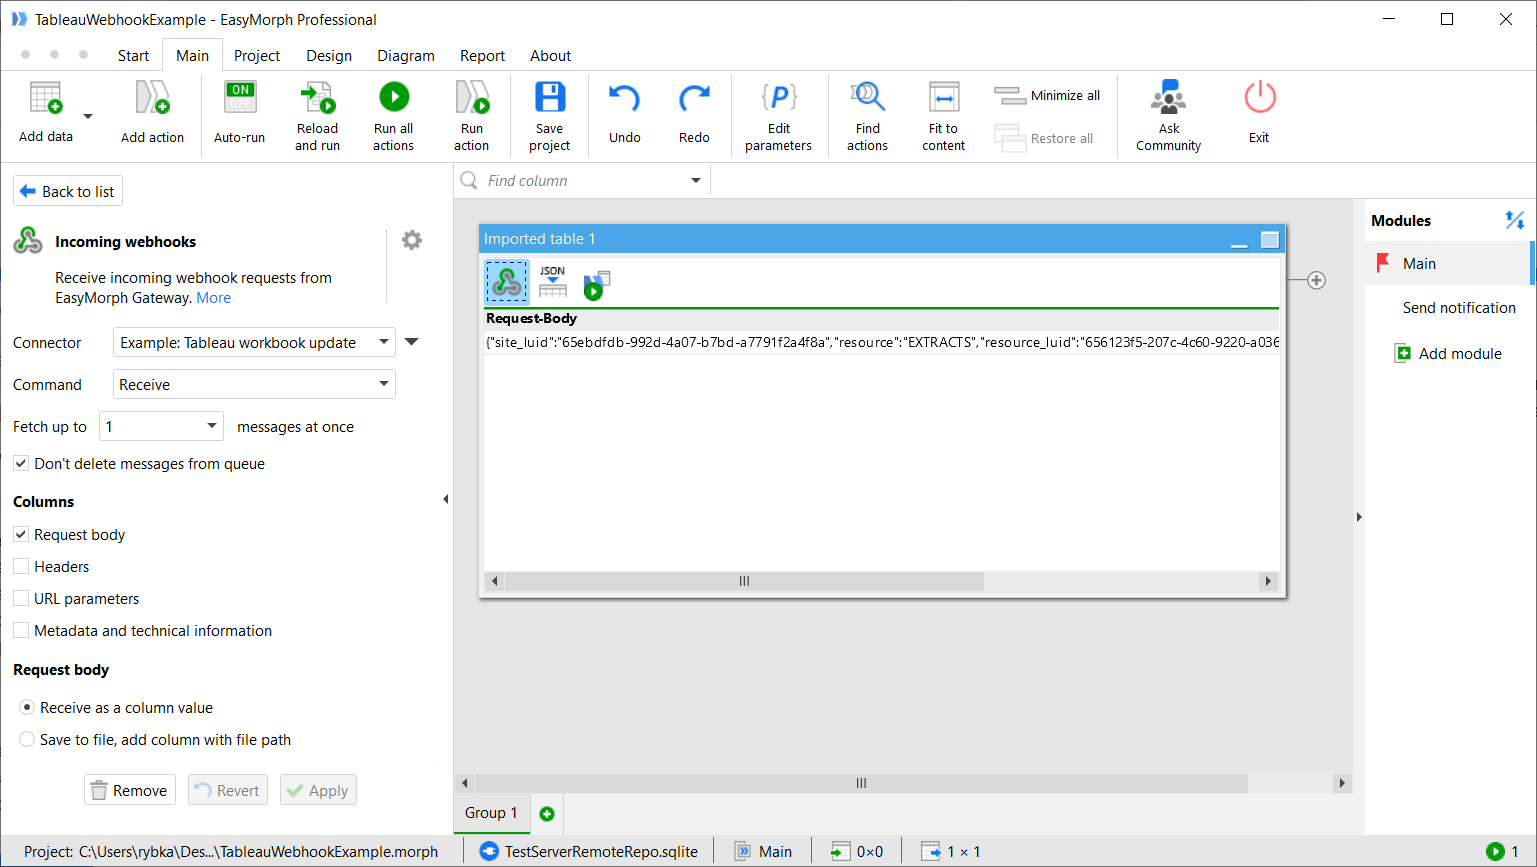
Create a new project and a new "Webhook endpoint" connector using the "Endpoint ID" and "Secret" values saved during the first step. Add the "Incoming webhooks" action to the project and configure it as follows:
Connector: Choose the created connector
Command: Recieve
Columns: Request body
Request body: Recieve as a column value
Make a workbook refresh fail in one way or another to retrieve a sample webhook payload.
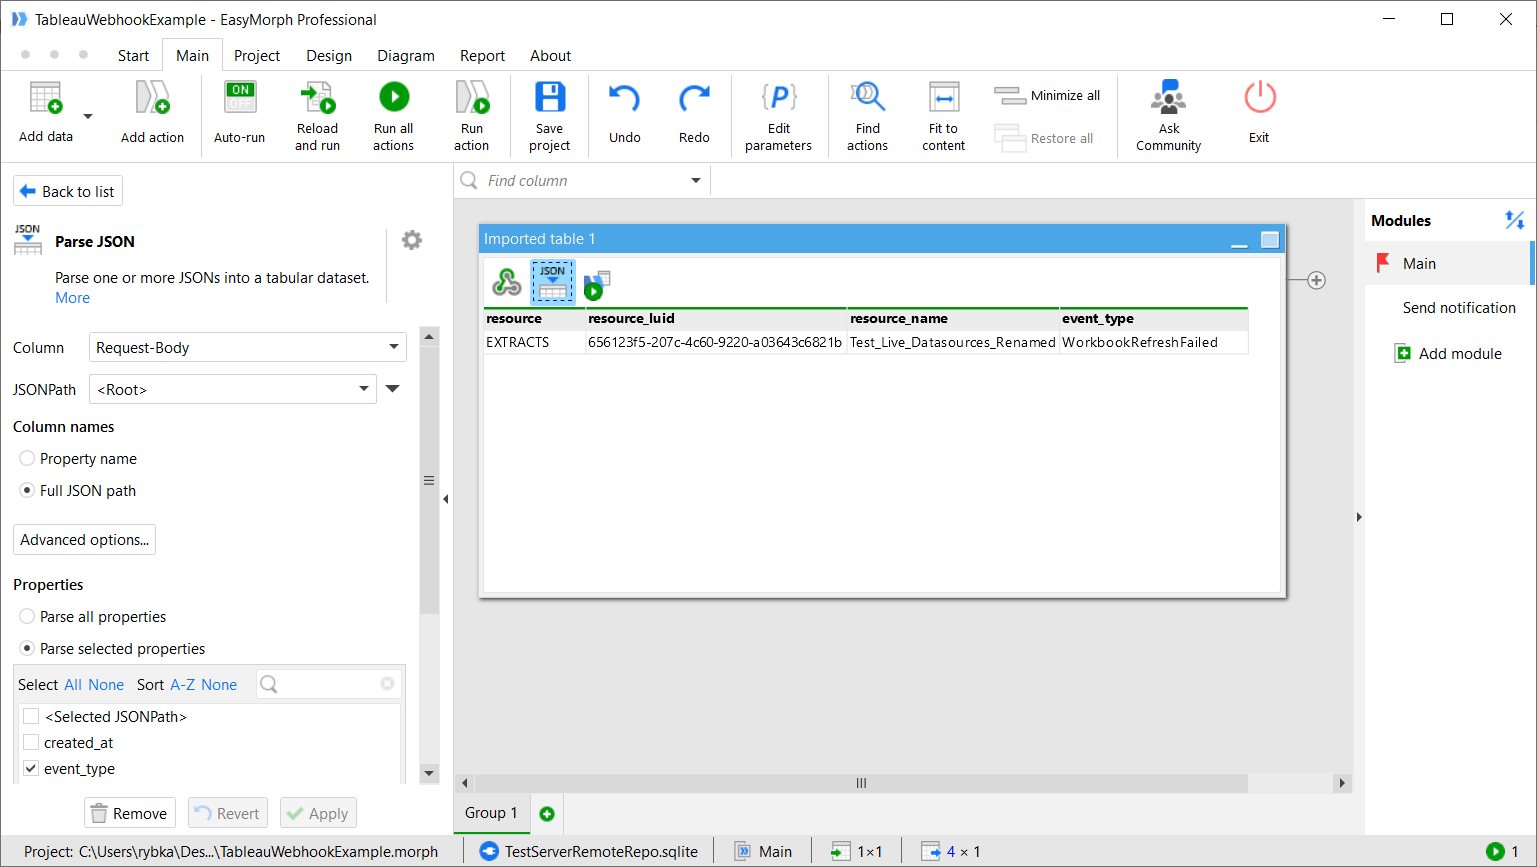
Add the "Parse JSON" action to parse the retrieved payload. The "resource_name" property will contain the workbook name, and the "resource_luid" property will contain the workbook ID.
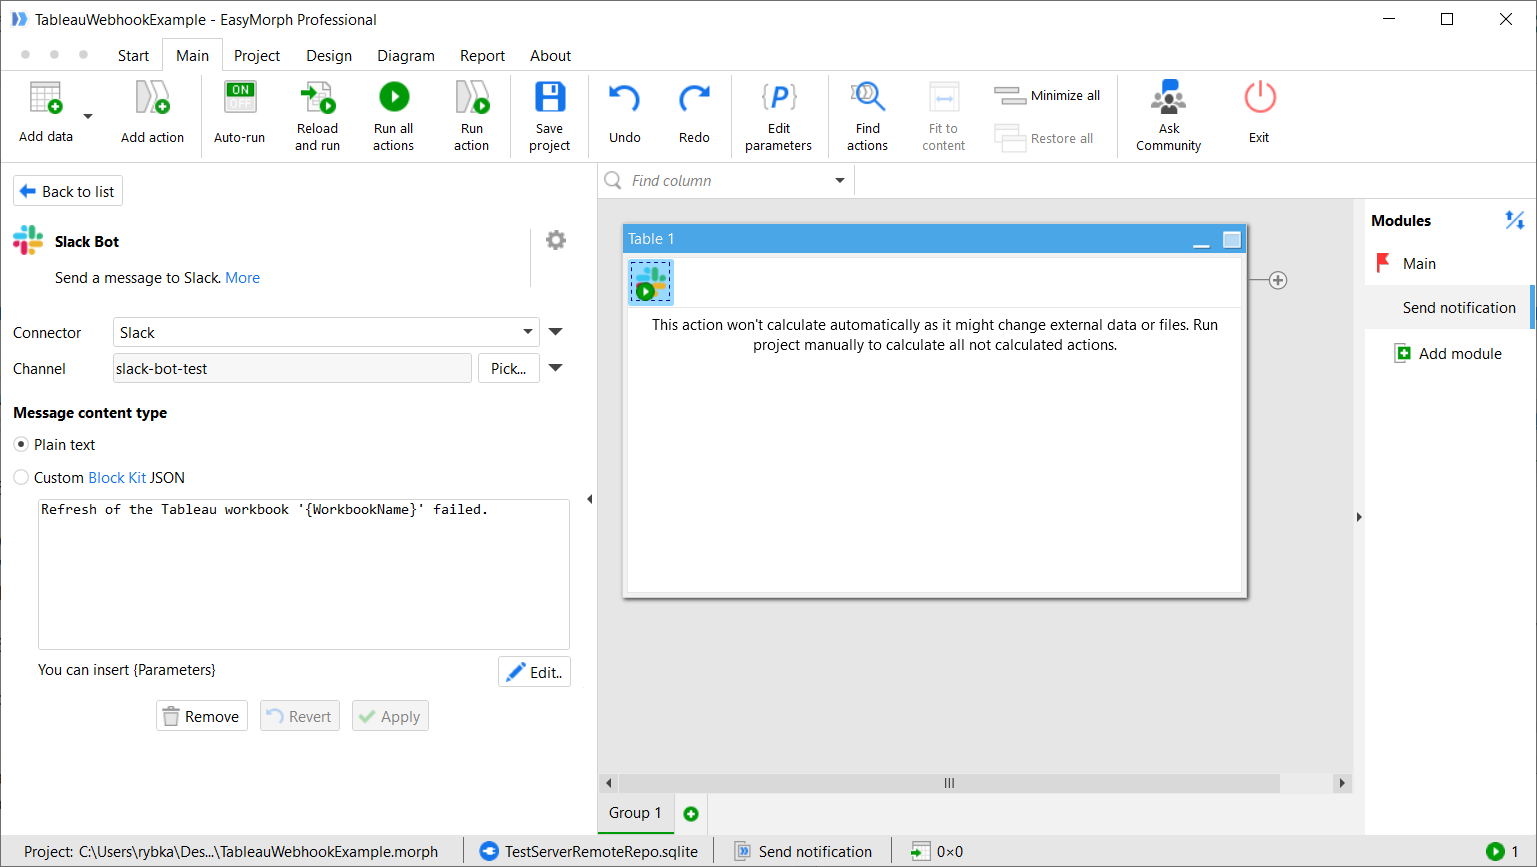
Step 4: Set up the Slack notifications
Create and authorize a "Slack Bot" connector and then add the "Slack Bot" action to the project.
If you want to add event details from the webhook payload to the Slack message content, you will need to move the "Slack Bot" action to a separate module and pass values as parameters in the "Call" action that calls that module.
Step 5: Make the Server to process incoming webhooks automatically
Upload the created EasyMorph project to the EasyMorph Server and create a task with that project.
Go to the server's "Gateway" page, click on the created Gateway endpoint, and switch to the "Tasks" tab. Check the "Process incoming messages with a task as they arrive" option, switch "Processing is" to "Active", select the created task, and click "Apply changes".
At this point, everything is ready to process webhook callbacks. Make a Tableau workbook refresh fail once again to test the workflow and see the corresponding message in Slack. It will look similar to the following message:

Questions, suggestions? Feel free to post them below.