Zapier is a popular cloud automation service with thousands of cloud applications supported. Using the EasyMorph action in Zapier, you can receive events from these cloud applications right in your on-premises EasyMorph installation, via the EasyMorph Gateway.
Step 0
Have your Gateway account configured and an endpoint created as described here: How to configure a connection to EasyMorph Gateway
Step 1: Request access to the EasyMorph connector in Zapier
The EasyMorph connector in Zapier is currently in private mode, so you need to add it explicitly to be able to use it.
- Create (free) account at Zapier.
- Click this link to enable the private EasyMorph connector: https://zapier.com/developer/public-invite/134357/249587d3ff8b17c08fae92f4fbffa7be/
If you still don’t see it in the list of actions in Zapier, send me a DM and I’ll share the connector with you by email.
Step 2: Create a zap
Zaps are small workflows (automations) in Zapier’s terminology. Every zap has at least 2 steps: trigger and action. The trigger step is an event such as a new tweet or form submission. The 2nd step is an action that is executed when the event is triggered. In our case, the action would be “EasyMorph”. It sends a message with the event’s details to EasyMorph.
Pick the 1st step whatever you would like.
In the 2nd step:
-
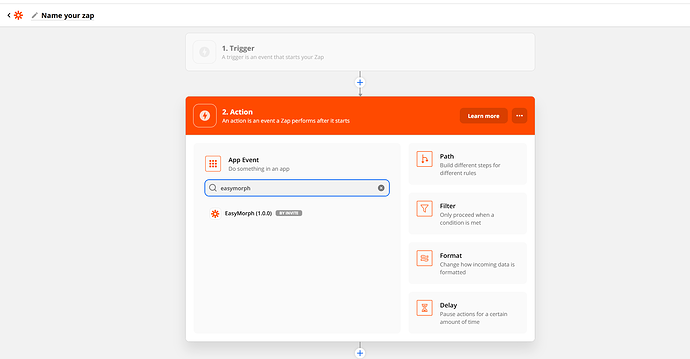
Find EasyMorph in the list of actions
-
Authorize with the endpoint ID and tenant ID (and optionally with a secret in a header or URL parameter)
-
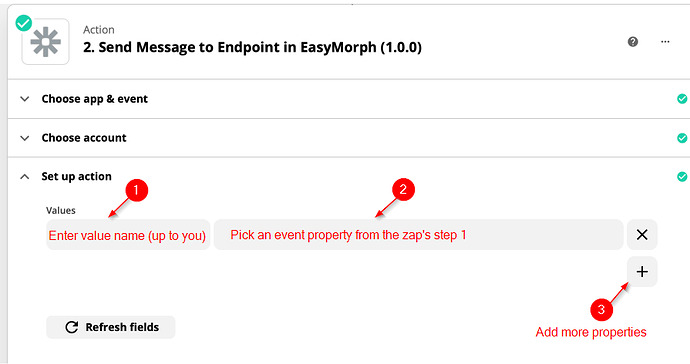
In the “Set up action”, configure a list of the zap’s trigger properties that you would like to send to your Gateway endpoint when the event occurs. Triggers may have many properties, but you can select only the ones that you need.
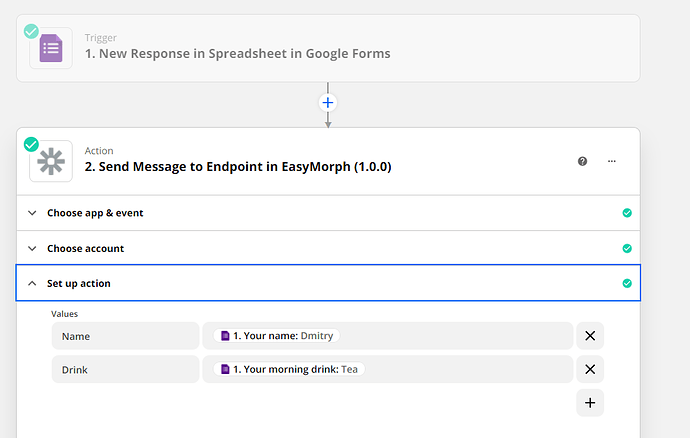
Here is an example of configured action:
When the example zap above is triggered (a new Google Form response is submitted), your Gateway endpoint will receive a JSON that looks like below:
{
  "Name":"Dmitry",
  "Drink":"Tea"
}
Notice that the JSON’s properties are named exactly as the values in the “Set up action” section in the screenshot above.


