The introduction of the custom API feature of EasyMorph Server opens new ways of integration with enterprise applications such as Power BI or Excel using web APIs. Here is a step-by-step instruction on how to do it:
Create an API endpoint
Workflow
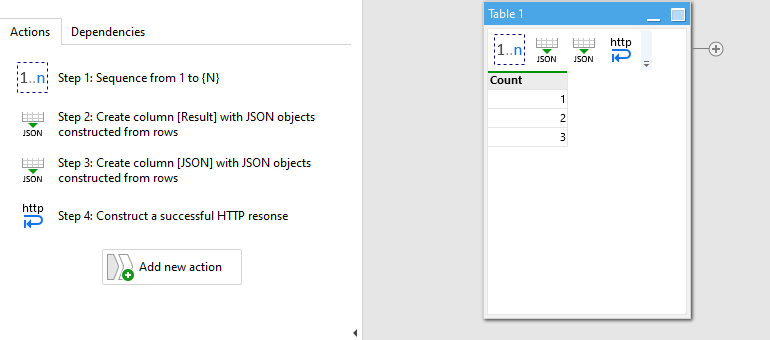
For demonstration purposes, we will use a simple project that generates a sequence of numbers from 1 to N, where N is specified using a parameter (also named N). The sequence is then transformed into a JSON object of the following structure:
{
 "Result":[
    {"Count":1},
    {"Count":2},
    {"Count":3}
  ]
}
In the last step of the workflow, we construct an HTTP response. Here is the project:
json-data.morph (3.1 KB)
Endpoint
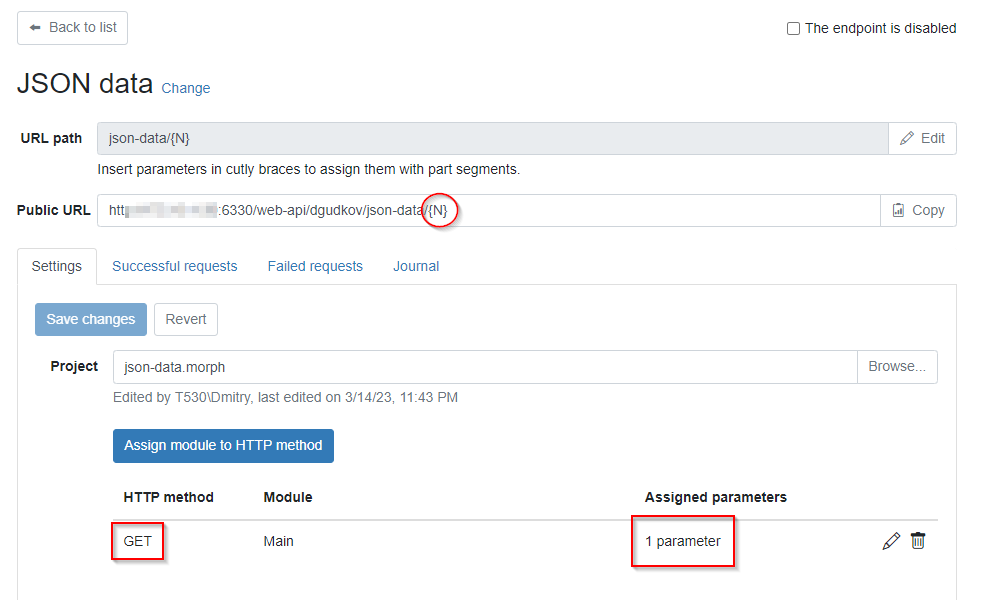
Now, let's create an API endpoint on EasyMorph Server. Creating API endpoints is described in detail here: How to create API endpoints without coding. In our case, it's an endpoint with URL json-data/{N} that accepts GET requests and has the last URL segment path linked to the parameter {N} of the workflow. See the screenshot below:
Import API data in Power BI (PowerQuery)
In Power BI Desktop, press "Get data" and select "Web" (see below).

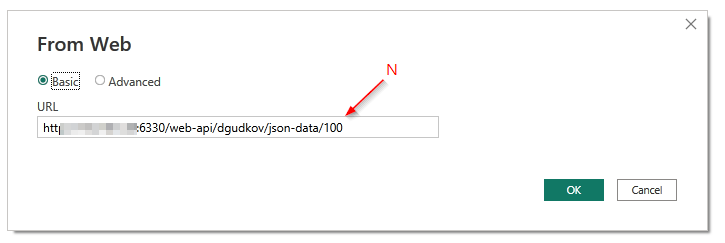
Now paste the full endpoint URL as below. Replace N with a number (e.g. 100).
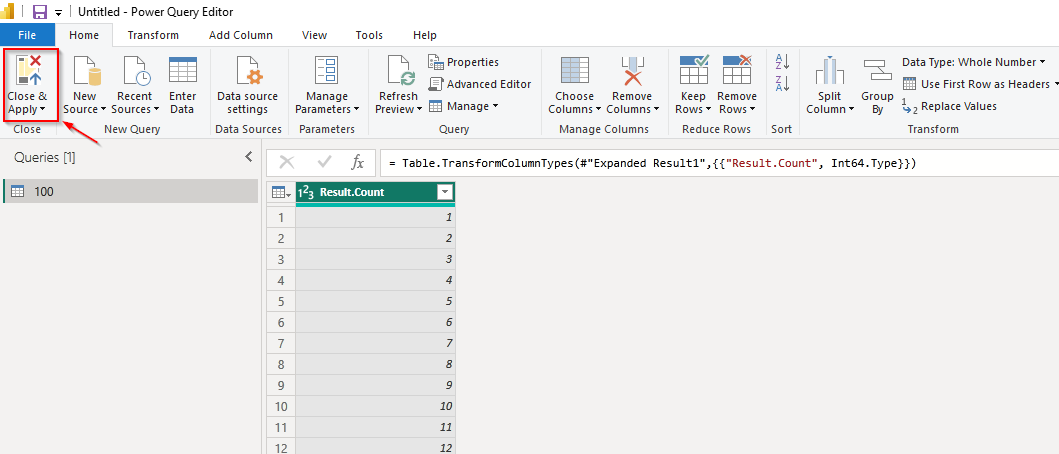
When you press "OK", a query will be created. The query returns the data obtained from EasyMorph Server. Press "Close & Apply" to finish adding the query. Now you can use it in Power BI for building visualizations.
Final remarks
The article uses a simple example that explains how to import data from EasyMorph Server using the standard web connector. The use of a parameter wasn't really necessary for the example to work and was only added for education purposes because queries frequently are parameterized (e.g. start date, end date, currency code, order number, etc).
Using a web API enables easy data retrieval from any system supported by EasyMorph, transformed as necessary using the wide range of transformations provided by EasyMorph.
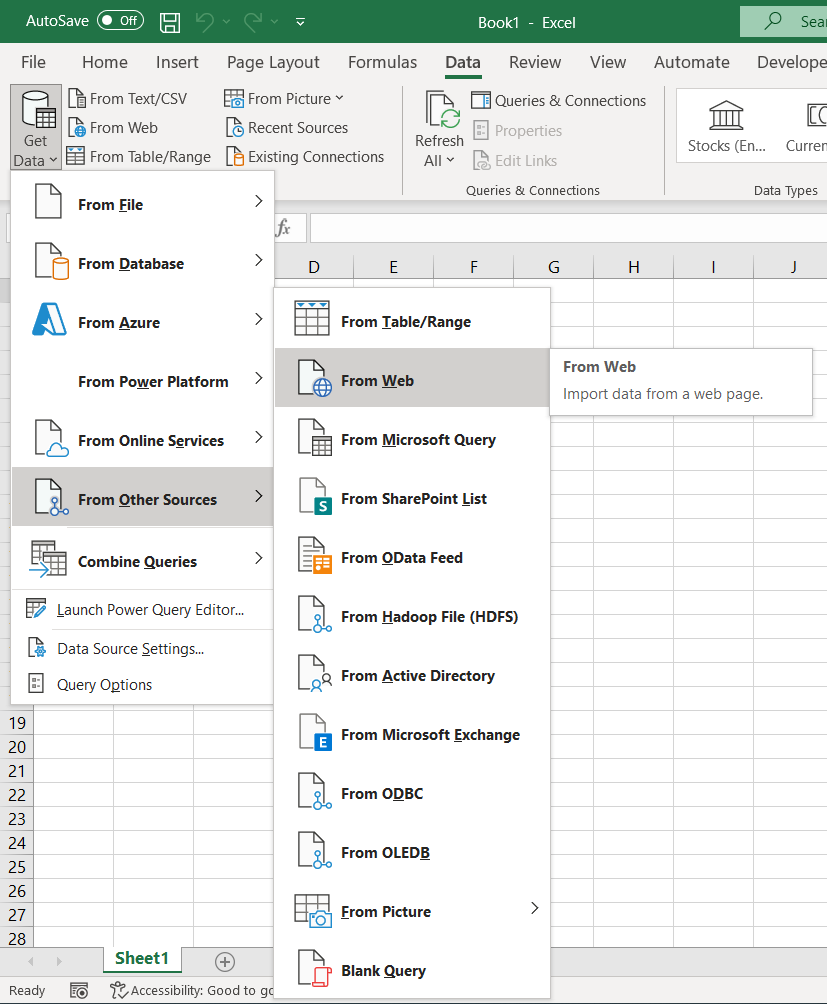
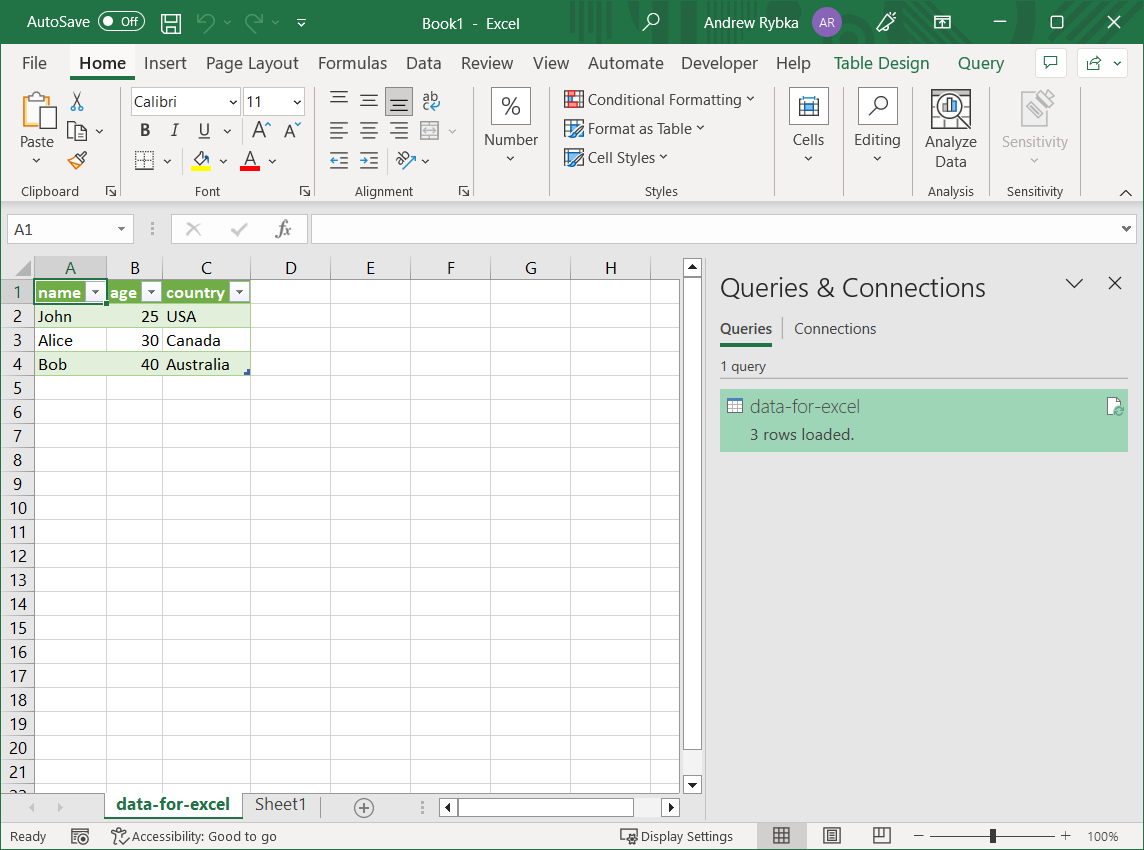
Retrieving the data from API in Excel will be described in a comment below.