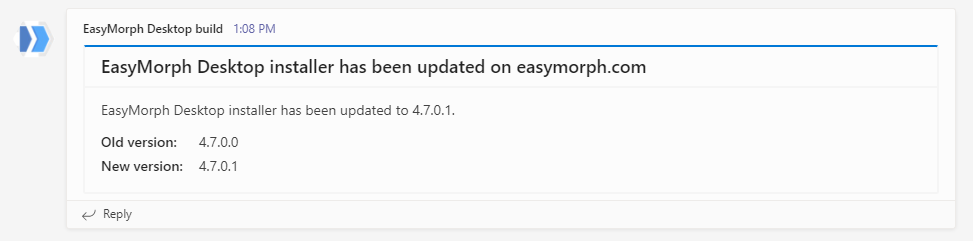
Sending highly formatted notifications from EasyMorph to a Microsoft Teams channel is relatively easy once you learn how to send web requests in EasyMorph. After reading this article you will be able to send notifications that look as below:
You can use such notifications in many cases:
- Notify about completed tasks or failed projects
- Send daily KPIs
- Generate alerts on data quality issues, significant metric deviations or changes in metric trends, etc.
Previously, I wrote on how to obtain data from web APIs. Sending notification to Teams is done in a very similar fashion, except we push information into a web API, instead of receiving data from it. Here is how it works in a nutshell:
- Add the "Incoming webhook" connector to your channel in MS Teams
- Configure the connector and copy the endpoint URL from the connector
- Create a "Web location" connector in EasyMorph. Paste the URL into the connector.
- Use the "Web request" action in EasyMorph with the "Web location" connector configured in the previous step to send a particularly composed JSON (an example is provided below in the article) to the URL.
Note that both Teams and EasyMorph have something that is called connector. When a connector is mentioned in this article make sure you understand whether it's a Teams connector or an EasyMorph connector.
Now, let's look closer at how to do it.
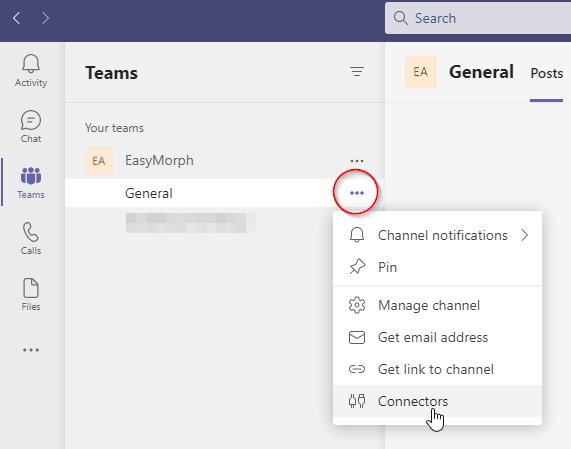
Step 1: Add the "Incoming webhook" connector to your channel in MS Teams
Go to channel settings in Teams and select "Connectors".
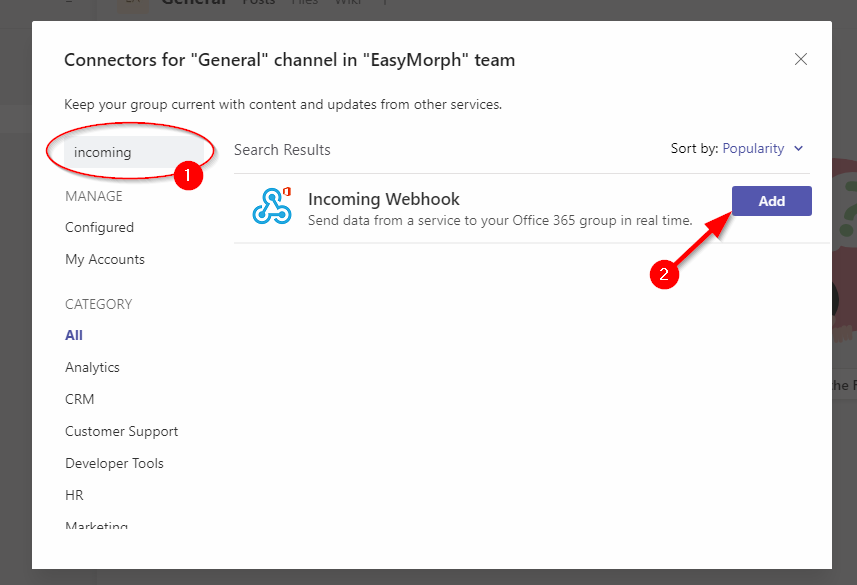
In the list of connectors, find the "Incoming webhooks" connector and press "Add".
Step 2: Configure the Teams connector
Now configure the connector: give it a name, and (optionally) change its icon. After that, Teams will generate a unique URL for posting messages in the channel.

The URL is rather long and looks like this:
https://yourcompany.webhook.office.com/webhookb2/435be63d-362d-4a02-b117-e525175fbc57@772e756f-e2e0-41cc-9816-52cc85c5e3b7/IncomingWebhook/62c622fa232d47e5ada8063c124655d3/06868a67-c335-439d-8ebd-1e331a0e47d7
For simplicity, Microsoft doesn't provide a means to secure the URL with a secret or some other form of authorization. So security, in this case, is only through obscurity. Therefore don't share the URL or any EasyMorph connector that contains the URL.
Also, make a copy of the URL because you won't be able to see it again (at least I couldn't find a way to do it).
Step 3: Configure Web Location connector in EasyMorph
Now, when we have the URL, it's time to switch to EasyMorph. Open EasyMorph and create a "Web Location" connector. Paste the endpoint URL as below:
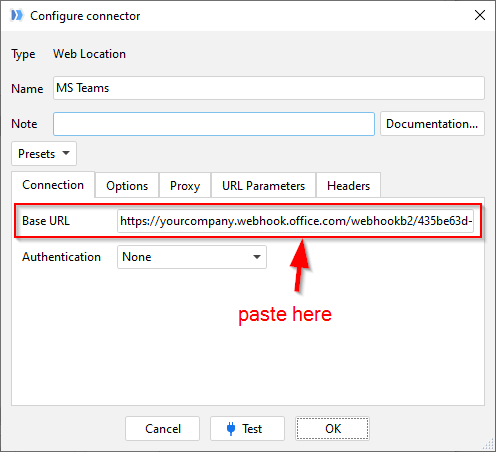
No other configuration required.
Step 4: Send a web request from EasyMorph to Microsoft Teams
Now the most fun part of it - sending a notification!
In your project, add the "Web request" action configured as below:
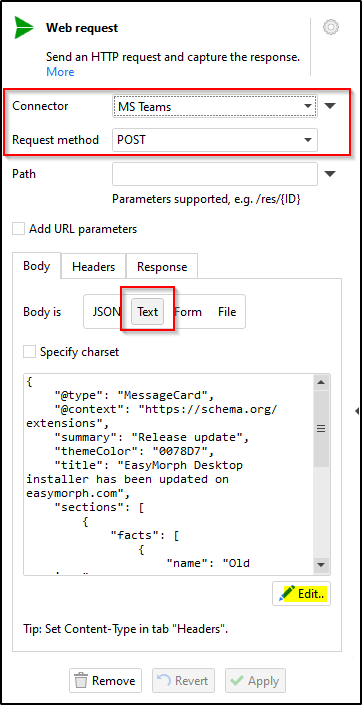
- Connector - use the "Web location" connector from Step 3 described above.
- Request method is POST
- Request body is Text
The request body specified in the action should be a JSON composed in a specific way. For instance, for the notification shown at the top of this article the following JSON was used:
{
    "@type": "MessageCard",
    "@context": "https://schema.org/extensions",
    "summary": "Release update",
    "themeColor": "0078D7",
    "title": "EasyMorph Desktop installer has been updated on easymorph.com",
    "sections": [
        {
            "facts": [
                {
                    "name": "Old version:",
                    "value": "{Parameter_old}"
                },
                {
                    "name": "New version:",
                    "value": "{Parameter}"
                }
            ],
            "text": "EasyMorph Desktop installer has been updated to {Parameter}."
        }
    ]
}
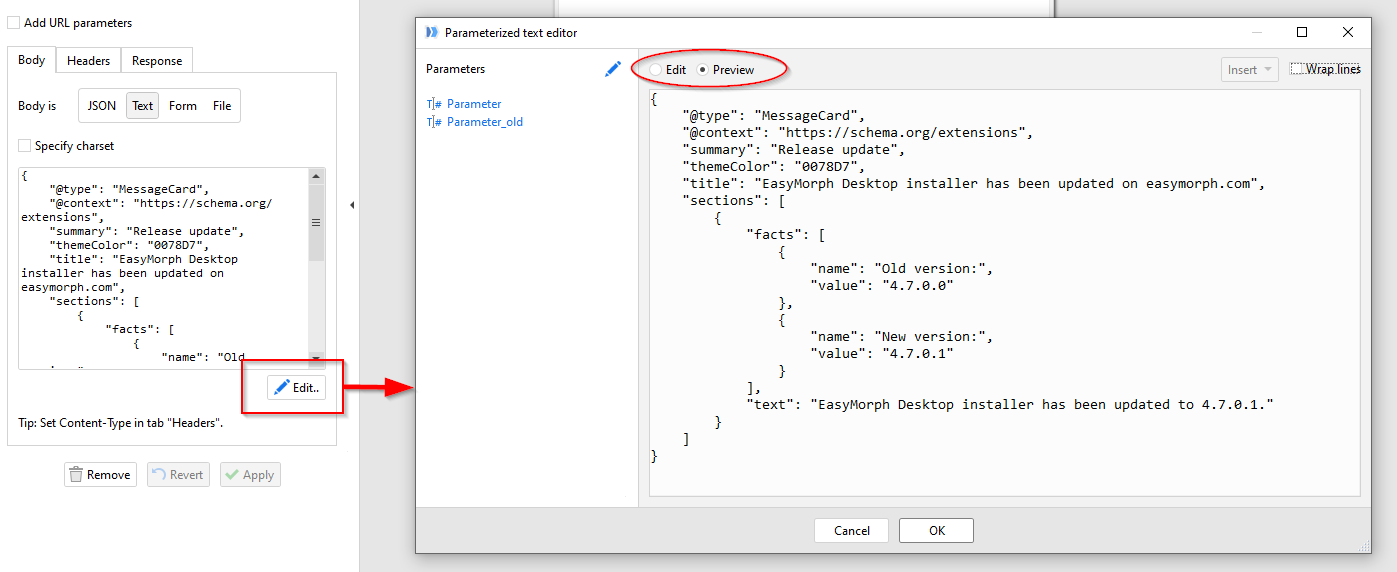
Note that it is possible to insert EasyMorph parameters into the JSON. The JSON above has 2 parameters inserted: {Parameter} and {Parameter_old}.
When using parameters, use the text editor's preview mode to see the exact JSON that will be sent in the web request.
Here is a sample project:
teams-notification.morph (2.5 KB)
The full reference for composing Message Cards and examples are available here: Actionable message card reference. Note that the Message Card format is being replaced with a new format called Adaptive Cards, but I didn't try it.
Actionable cards in Microsoft Teams can have quite impressive feature set. They can include tables, images, hyperlinks, and action buttons. It's an interesting area for exploration and experimentation. If you made interesting discoveries or use cases, please feel free to post a comment on this article.
