While a dedicated Salesforce-related action and connector are already on our to-do list and planned for release in v5 later this year, you can already start querying Salesforce using existing EasyMorph tools! In this article, I will explain how to create and configure a connection to Salesforce. Also, a working sample project is attached.
Creating Connected App in Salesforce
First, you need to create a new Connected App. Note that using Web API in Salesforce requires you to have an Enterprise or Unlimited account (as of January 2021).
To create a Connected App, you should go to Platform Tools → Apps → App Manager and then pick the “New Connected App” button that’s located in the top-right corner of the app manager page.
Fill in required fields, such as “Connected app name”, “API name,” and “Contact email” — fill them as you like, then tick the “Enable OAuth settings” checkbox.
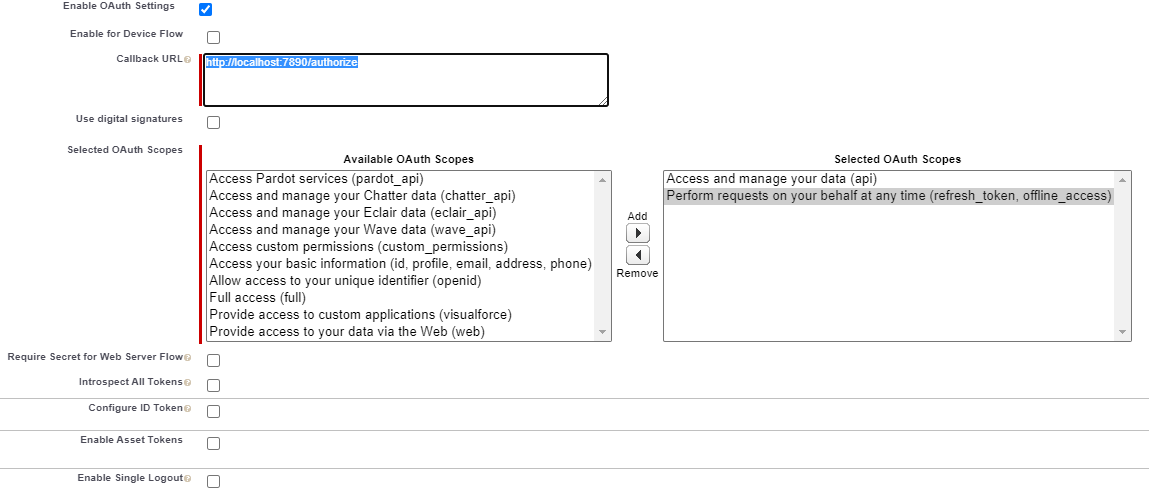
In “Callback URL” below, enter the local address that Easymorph would use to receive authorization tokens. This should be something like “http://localhost:XXXX/authorize”, where XXXX is a free port of a PC that your copy of Easymorph runs on. Pick any number you like — for example, “http://localhost:7890/authorize” should work fine — but remember to enter exactly this URI in the “Redirect URI” box during the connector configuration step. Salesforce checks this URI to match during the OAuth process.
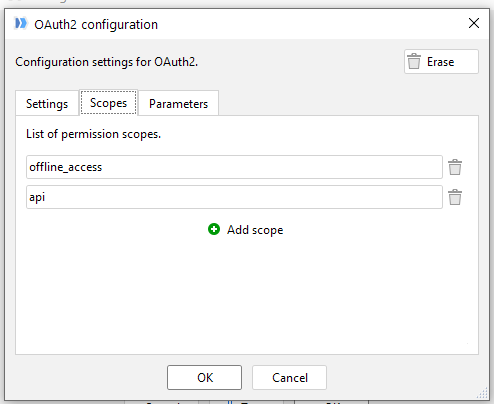
In “Selected OAuth scopes,” pick “Access and manage your data (api)” and “Perform requests on your behalf at any time (refresh_token, offline_access)”. These scopes too have to be entered during the connector configuration step.
Generally, your OAuth settings box should look like this:
After you are done with filling in the rest of the description, click the “Save” button at the bottom of the page and wait for approximately 10 to 20 minutes for Salesforce to recognize your newly created application.
Configuring EasyMorph Web location connector
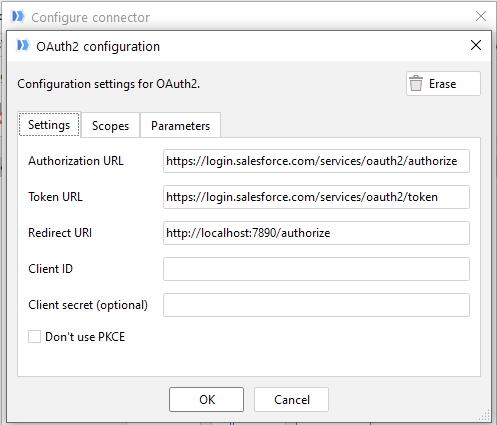
In Easymorph, go to “Connector Manager”, pick “New Connector” → “Web location”, then click “Presets” and pick “Salesforce”. That should fill all standard fields, including permission scopes and authorization/token/redirect URLs
Now you have to fill two remaining fields (Base URL in general Connection tab and Client ID in OAuth configuration window), and you’re good to go.
Click the “Configure” button next to the Authentication combobox (that should display “OAuth” now). OAuth configuration window should appear. Open the “Settings” tab and fill in the Client ID field using values from Salesforce Connected App “Consumer key” configuration field. To find it, go to your Salesforce account, Apps → App Manager, find your newly created Connected App and click the dropdown icon situated in the rightmost column, then choose the “View” option. On a page that appears, you should see your Consumer Key in the API section:
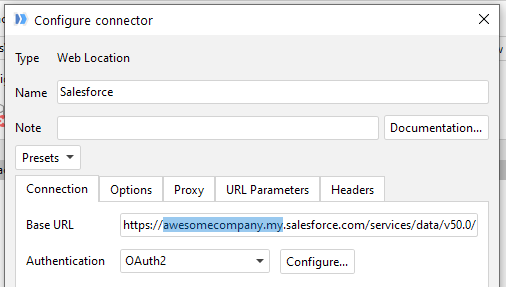
Now you have everything that is needed to complete the authentication step but to be able to run queries against Salesforce you have to enter one more value, that’s a “Base URL” in the Web Location connector “Connection” tab.
For Salesforce, this URL is a combination of your assigned instance ID and Web API URL and should look like
In this example, EU40 is an instance name and the rest is a base URL for running SOQL queries. The instance name is provided by Salesforce in a custom “instance_url” claim during the OAuth flow process and as such is not recognized by EasyMorph for now, but it can be guessed.
First, you can go to your Salesforce account, Settings → Company Settings → Company Information and there you have the “Organization detail” block and “Instance” field.
Second, you can copy the first part of the URL while you are at your Salesforce account page. Enter copied text as an instance, postfixed with ‘.my’ part, see below:
Copy first subdomain from URL (that’s your account name)
![]()
And paste it like this, appending ‘.my.salesforce.com/services/data/v50.0’ afterwards
Now you should be able to press the “Authorize” button in the connector window and start querying your data!
Querying Salesforce
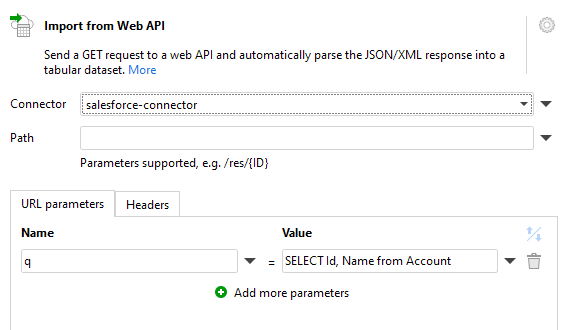
The easiest way to execute SOQL Query is (if you have less than 2000 resulting rows) to use the “Import from Web API” action. Just add this action, select your newly created Salesforce connector and add “q” to the URL parameters block. That’s where you can enter queries in SOQL:
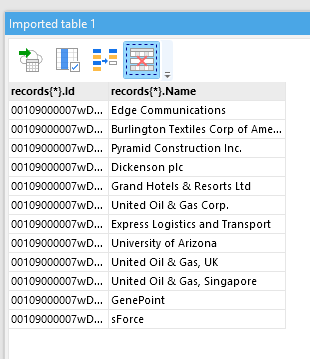
Apply deduplication/cleanup actions to your taste and you should be able to see your data:
However, when the expected row count for your query exceeds 2000 (default Salesforce page size), such a simple approach would not suffice, and you will need to deal with paging, which is implemented in Salesforce via server-side cursor that has to be consecutively queried using “nextRecordsUrl” response field.
Handling server-side cursors can be done by the “Iterate Web request” action and is a little out of the scope of this article, but for those who need such functionality right now, there is an example project with a ready module in the attachment:
Salesforce Query Example.morph (8.4 KB)
Note that the attached example does not include an embedded Salesforce connector, and you have to create your own and use it instead of the 'salesforce-connector' placeholder in the 'Sf Query' module
The project allows executing any SOQL (Salesforce Object Query Language) query specified as a project parameter and return the result. Even if you don't want to get into details on how the project works, you can use it as a "black box". Just configure a Salesforce connector, then run this project with a SOQL query from other projects in order to pull data from Salesforce.
