Data preparation workflows are a core part of a data team’s day to day. But the real value of these workflows is not how you process data, it’s the automation that allows you to decide what to do with it.
Rather than creating manual steps of a workflow and running it yourself, you can build logic that checks your data for a specific condition and only acts when that condition is met. This is the idea behind conditional actions.
For example, let's say you need to review your inventory report each week. Instead of manually looking through it, a workflow can check it for you. If everything looks fine, the workflow stops. But if a problem is found, you can automatically generate a report with inventory issues and send it to a team member who can take action on the problem.
This is the kind of automation that reduces repetitive checking, slow response times, and ensures important things don’t slip through the cracks. Throughout this article, we’re going to showcase how you can build one of these automated data prep workflows with conditional actions.
Why adding conditions matters
What’s great about adding conditional actions is that they allow you to evaluate conditions before continuing to perform tasks. These actions determine when to take action and as a result, this allows the workflow to be more efficient, and only bring up concerns when the data indicates that some form of action should occur.
In the case of inventory management problems, if there are no problems found, it doesn't make sense to create reports or send emails. But, let’s say there are overdue orders that haven’t gone out on time. In this case, our conditional action can let managers know when those orders haven’t been completed, and can notify the team to finish those orders immediately.
The big takeaway is this can save you hours of manual work, speed up information processing, and help your teams take action on problems that affect your business before they grow too big.
How you can build a conditional workflow in EasyMorph
EasyMorph uses conditional actions in order to determine when your workflow should continue or cease. So what this means is that once you've set your conditions, you can add an action that stops the workflow from continuing if no matching records are found.
If, however, you find matching records, the remainder of your workflow will run and this may include tasks such as creating reports, sending emails, etc.
EasyMorph makes it easy to perform some kind of business related task if certain conditions are met in your data. This means any business team can automatically notify the right people, update information across systems, or create tasks for the relevant team, all without anyone having to manually check a thing. Let’s look at how we can build this in EasyMorph.
What We'll Build
In the steps below, we’ll walk through an inventory management example where we have overdue orders that are not complete. We’ll check to see if overdue orders exist, if they do, we’ll generate a report, and email it as an attachment to a corresponding email. And then we’ll schedule it to run every week.
Here's how to build it, step by step.
Step 1: Import Your File
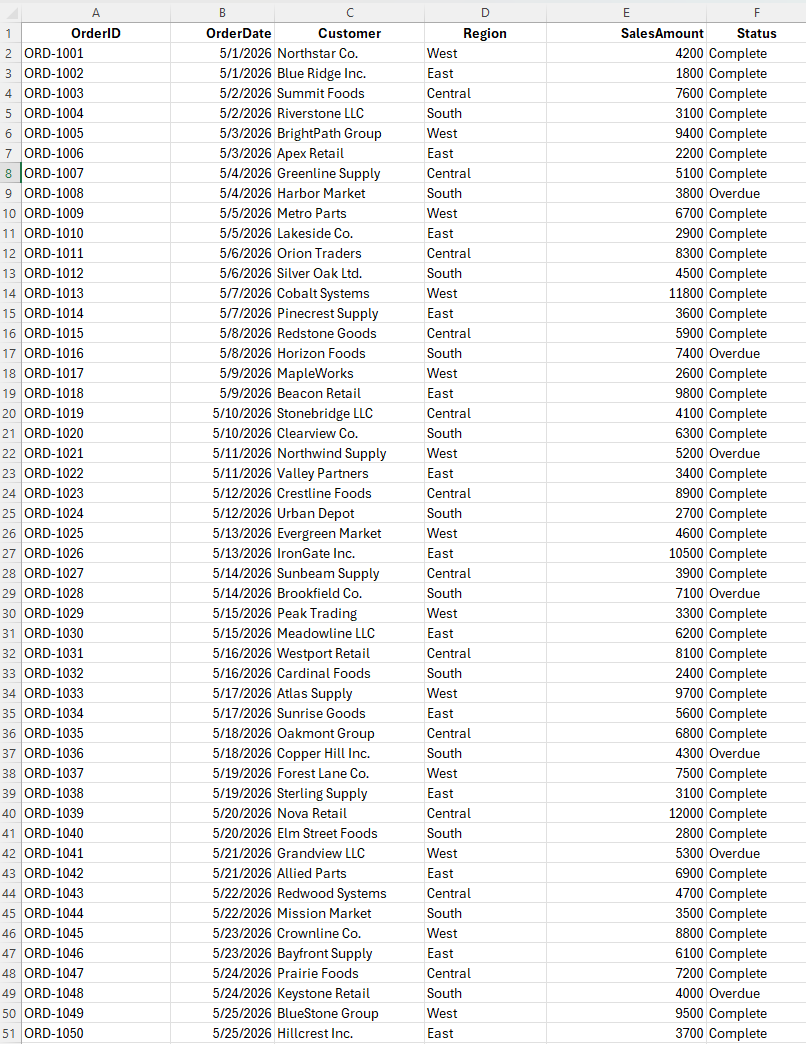
The first step is getting your data into EasyMorph. In this example, we're working with a weekly inventory Excel file that tracks OrderID, Order Date, the Customer, Region, Sales Amount and Status.
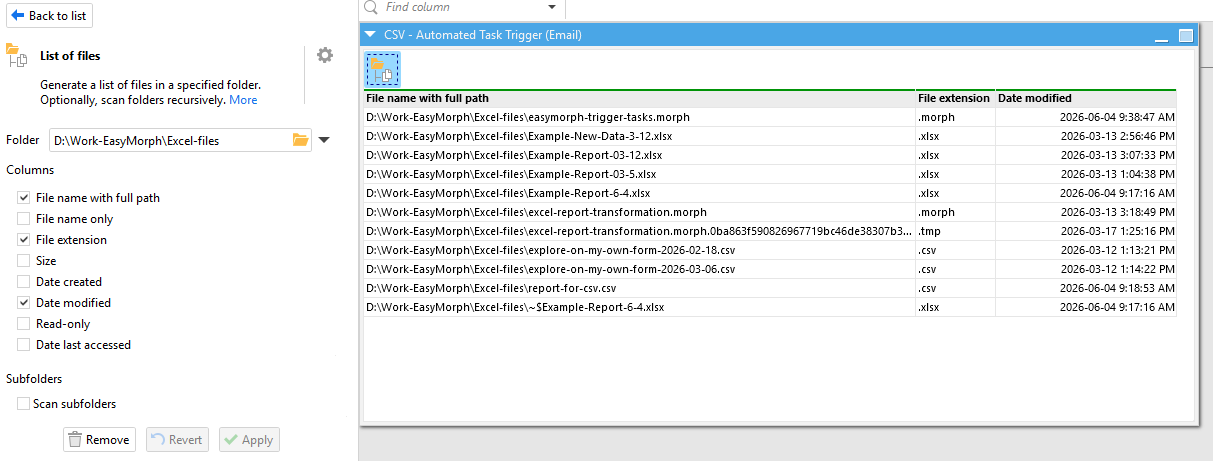
To ensure the workflow is automated, we can’t just import the file by name. We will need to import the latest version of our inventory. In this case, we’re going to import the latest updated CSV file. But you can pull the latest information from a database or cloud tool of your choosing just as easily. The process is as follows:
First, add the List of Files action and select the folder where your inventory reports are saved. For this example, we also need to make sure we select the extension and date modified columns, which we will expand more on later. Keep in mind you can also use actions to pull from shared team folders like Google Drive or SharePoint.
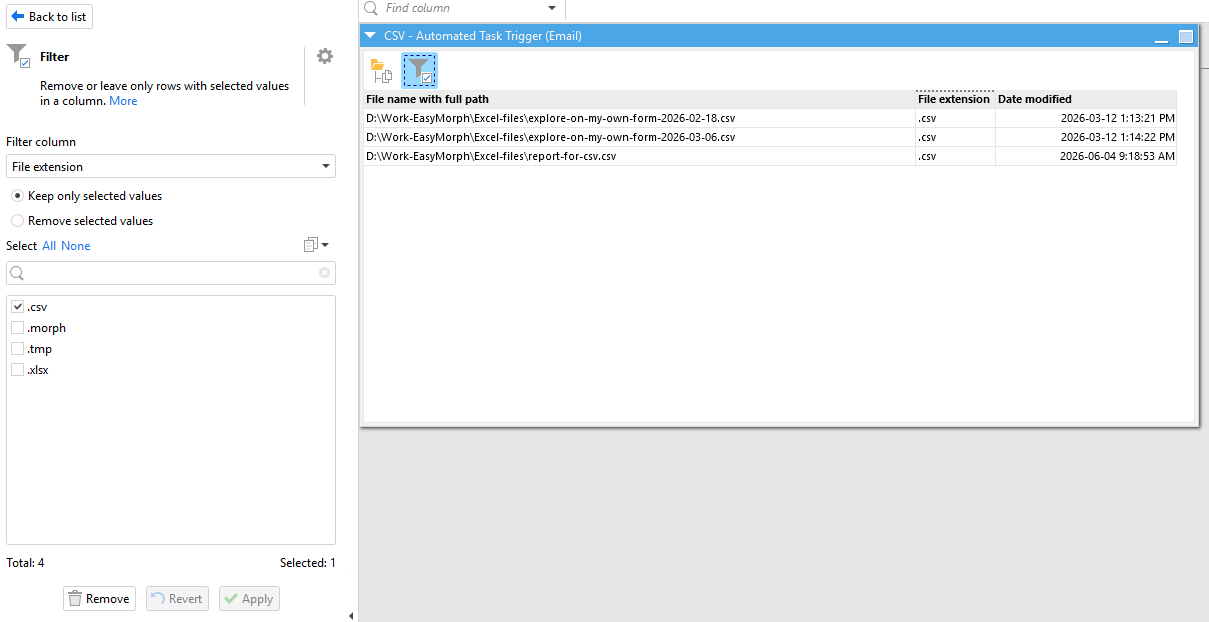
Next, add the Filter action to make sure it only selects .csv files, so no other file types get picked up.
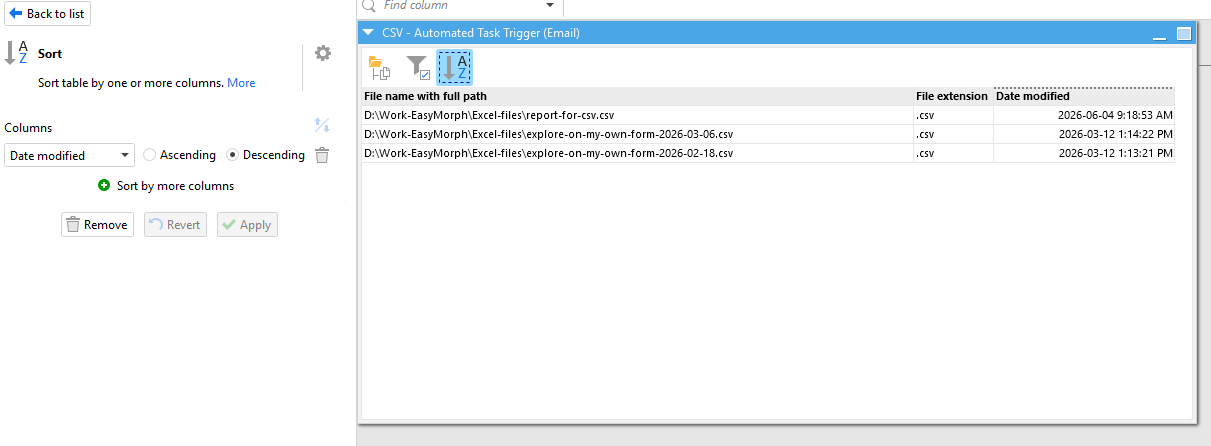
Then add the Sort action to sort the most recent date at the top (descending), so you're always working with the most up-to-date inventory report.
Next, add the Keep Min/Max action and keep only the top row, the most recently created file. Keep in mind that this step could technically be skipped if you’re always working from the most recently modified file, which will always appear at the top of the list.
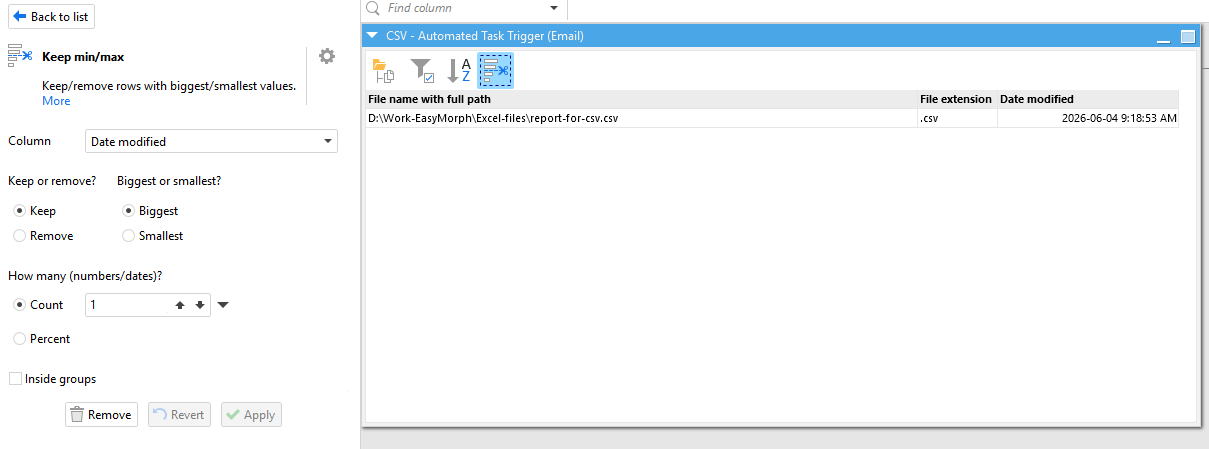
Finally, add the Import delimited text file action and change the path type to “First value of column” and then select the column, "File name with full path" to pull in the correct file.
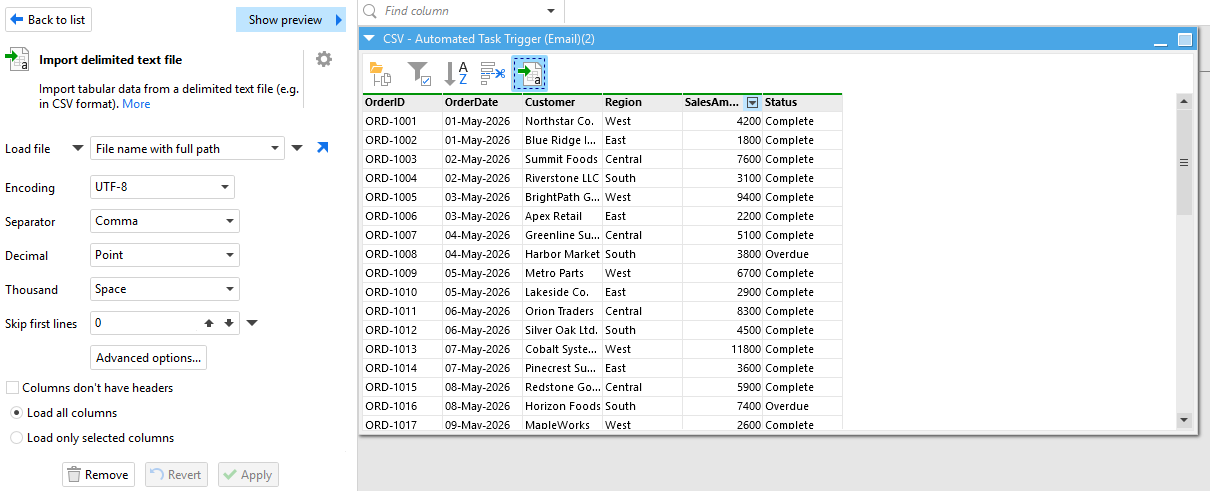
Now you’ve dynamically imported your CSV file and if you run this in the future, it will always import the most recently modified report.
Step 2: Setup your condition criteria
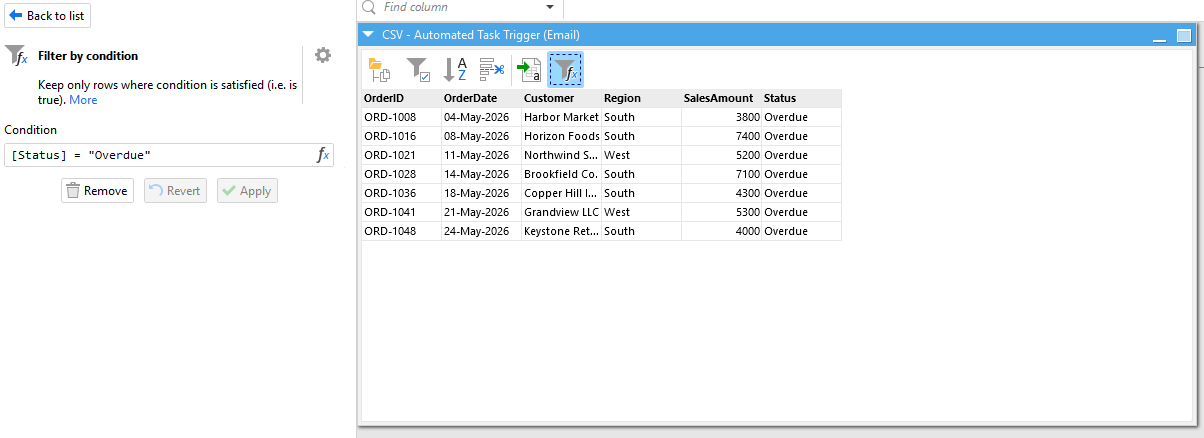
Next, what we want to do is create a condition that only shows the Overdue orders and does some sort of action if any Overdue orders exist. In this case I’m going to add a Filter by condition action and set the condition as [Status] = “Overdue”.
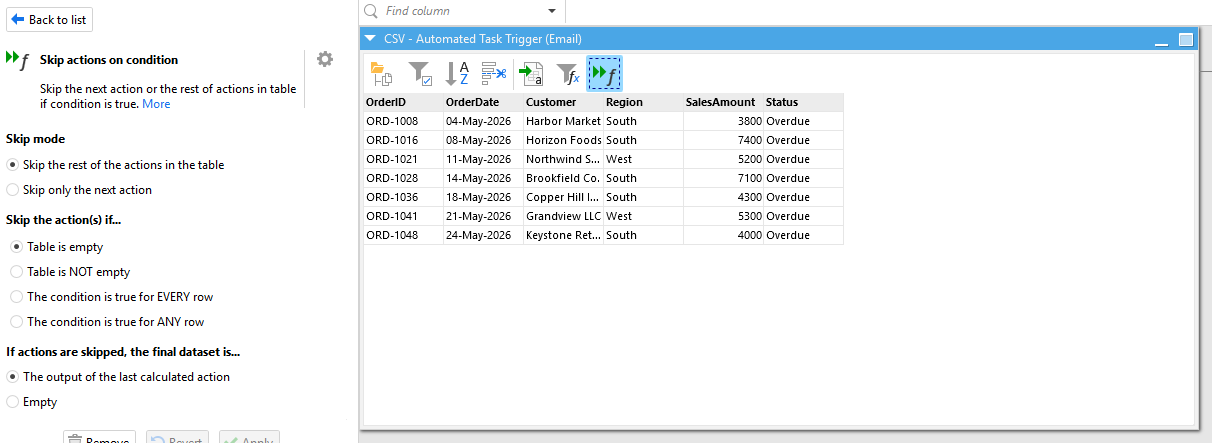
Next I’ll add the Skip actions on condition action. I’ll use Skip mode “Skip the rest of the actions in the table” and Skip the action(s) if the “Table is empty”. This will make it so any other tasks after this action will only take place if and only if the status is “Overdue”.
Step 3: Export your report
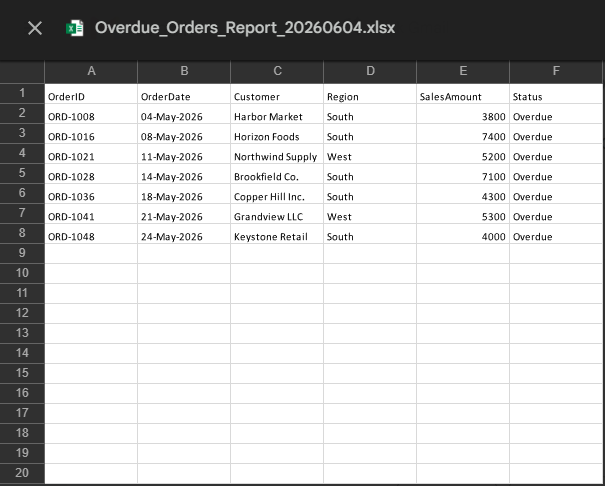
Next, I want to dynamically export my report from the date the workflow was run. What this will do is create a report that only shows the orders with status Overdue.
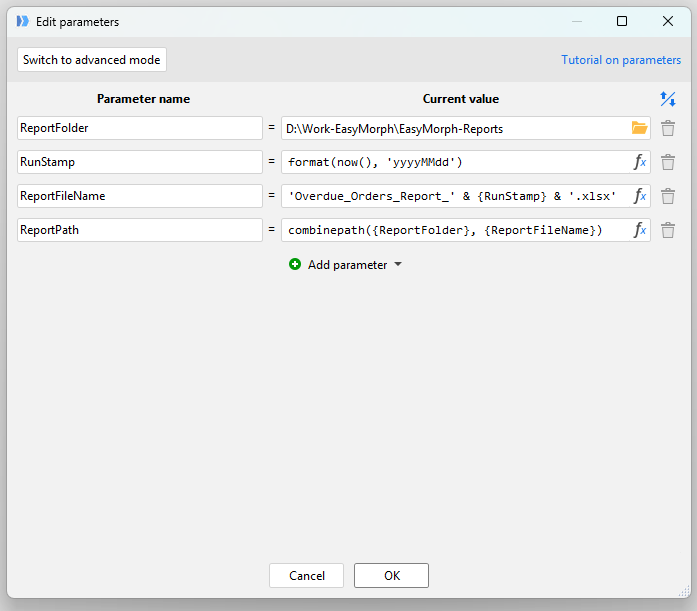
In order to do this, I will need to create a few parameters because I will need to use these parameters to generate the report and perform some action in the future. In this case, I create four parameters, setting each as below:
-
I add a Folder parameter titled ReportFolder = D:\Work-EasyMorph\EasyMorph-Reports ; This lets me select where the report will be saved to.
-
I add a calculated parameter titled RunStamp = format(now(), 'yyyyMMdd') ; This lets me generate the date and time of when the report will be generated.
-
I add another calculated parameter titled ReportFileName = 'Overdue_Orders_Report_' & {RunStamp} & '.xlsx' ; And this one lets me create the report file name and how it is saved. Keep in mind this is reliant on the other parameter titled RunStamp.
-
Last, I add the next calculated parameter titled ReportPath = combinepath({ReportFolder}, {ReportFileName}) ; And this one finally gives me where the report is saved and the file name, so I can attach it to my email.
Keep in mind that you can combine the parameters above, but I broke it down so it’s more clear.
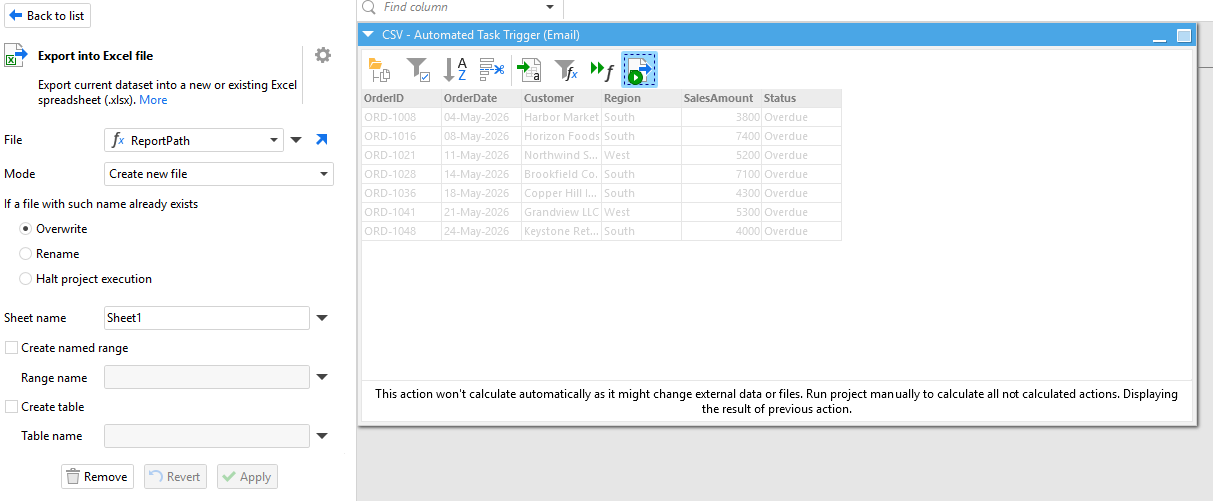
Next, I need to export my report dynamically. So, I’m going to add the action Export into Excel file to export my report. I will set my file to a parameter, using the ReportPath parameter I set before. And then I will add mode Create new file and select Overwrite, so it’s overwritten with the most recent report.
Step 4: Set the final conditional action (sending an email)
In the last step I’m going to use several of my parameters to automatically send an email.
In this case, I’m going to use my Gmail connector (if you’d like to learn more about setting this up, go here). And now I will send it to an email I’m familiar with, in this case marketing@easymorph.com.
Next for the subject, message and attachment:
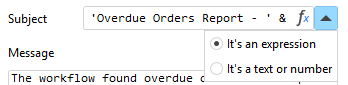
- The subject line should be set to an expression and in this case I will set it to “'Overdue Orders Report - ' & {RunStamp}” ; This will allow me to send the subject line as a dynamic value based on when the workflow was run.
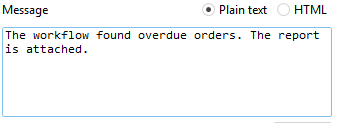
- The message: “The workflow found overdue orders. The report is attached.”
- And finally, for attachments, I select a parameter from the drop down. And then I can select ReportPath, so it automatically attaches my new report.
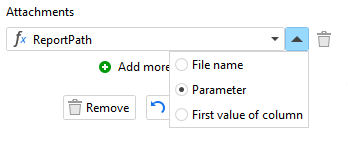
The final configuration of your Send Email action should look like this below.
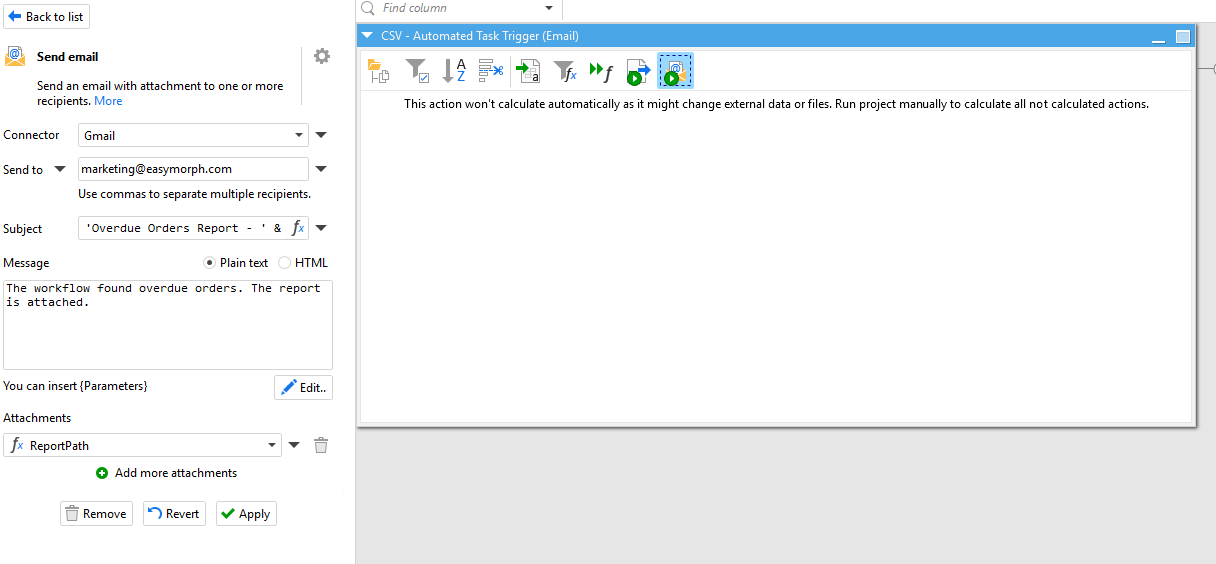
To summarize, when this workflow is run, it should dynamically pick the most recently updated CSV Inventory file from a folder, check to see if there are any overdue orders, if there are it will continue to export the report dynamically with the date, and then it finally sends the same report via email to the person of your choosing.
Next, all we have to do is click Run all actions.
And now, you should be able to see the email as shown below.
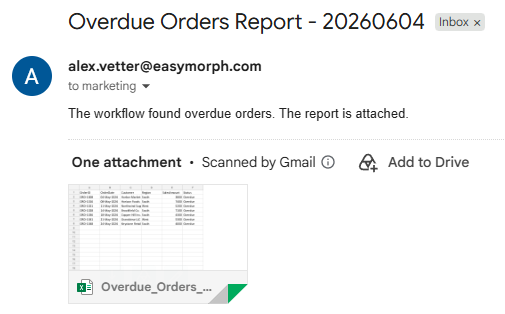
And here is the report.
Step 5: Automate your workflow
The last step we need to complete is automating the workflow. To schedule your automated CSV notifications, you'll use EasyMorph Launcher, which comes installed alongside EasyMorph Desktop. We’re going to open EasyMorph launcher. And we’ll click New Task.
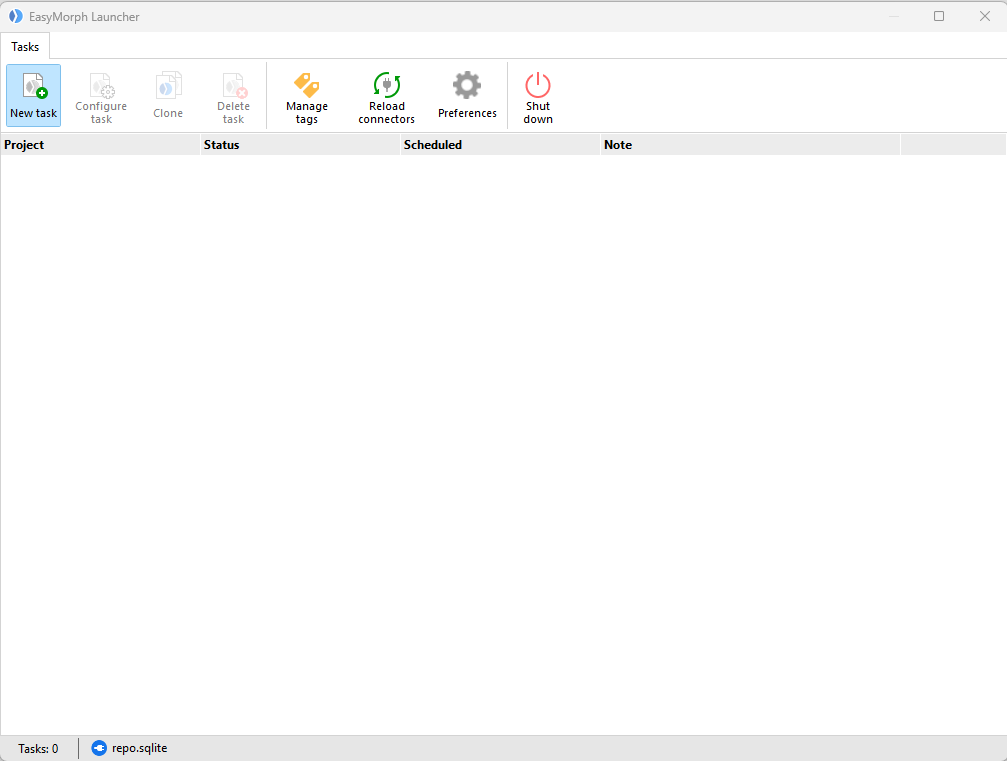
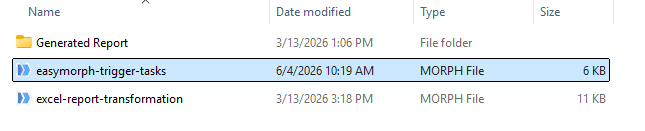
And then we’ll select our workflow. Keep in mind that we’ll need to save the workflow to a given folder. In this case I’ve saved the workflow as easymorph-trigger-tasks.morph.
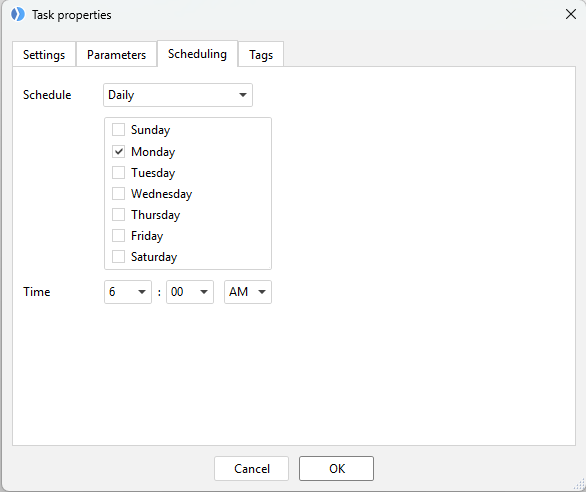
And next, we’ll schedule it daily so the workflow starts at 6 AM every Monday morning.
Click Ok and now you should see it under your EasyMorph Launcher Application as shown below.
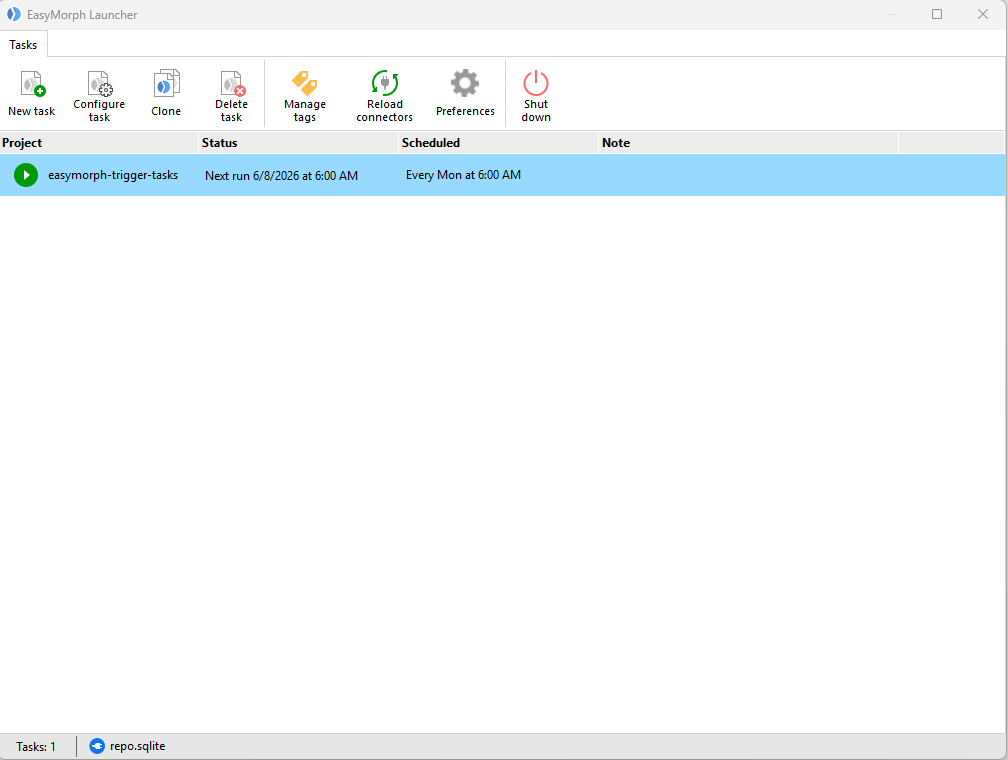
Now your workflow is entirely automated. So whenever you receive new reports in the same folder, you can automatically check if there’s any overdue orders and automatically send a report and an email to the person or people of your choosing.
Important note: If you're running EasyMorph on a local machine, that machine needs to be turned on at the time the workflow is scheduled to run. If you need always-on scheduling or more advanced triggers, EasyMorph Hub offers server-based scheduling that runs regardless of whether your local machine is on.
A golden business opportunity with conditional actions
What’s great about conditional actions is that they take an ordinary data prep workflow and make it work for you, instead of doing everything manually. The data will be evaluated by the workflow, a determination made based upon your conditions, and only when that condition is met, will the workflow proceed.
In terms of how this process might apply, the same methodology could be applied to virtually all types of workflows including Inventory Management, Order Tracking, Financial Reporting or any work in which you only want to react when a particular item appears in your data.
If you are currently using EasyMorph for Data Preparation, implementing conditional actions would be a logical follow-up. Use a simple condition as a base, and begin building on top of it. Allow your workflow to do the checking for you; thereby allowing you to attend to the items requiring your direct attention.
If you’d like to see more of the advanced capabilities of triggers with EasyMorph, we’d recommend checking out EasyMorph Hub.